Support our educational content for free when you purchase through links on our site. Learn more
🏕️ 15 Essentials to Survive 5 Days of Camping

What should I bring to survive 5 days of camping? Pack a reliable shelter and sleep system, layered clothing, five days of food plus a backup, safe drinking water and treatment, first aid, navigation, lighting, and a way to call for help. Then adjust the list for your destination, forecast, group, and whether you’re car camping or carrying everything on your back.
“Survive” doesn’t mean living off the land or hauling a shed into the woods. It means staying warm, hydrated, fed, oriented, and prepared if plans change. Our campers have learned that the unglamorous details—like testing your water filter and keeping one dry layer for sleeping—can make a much bigger difference than another shiny gadget.
Five days also makes small oversights add up: one forgotten meal, a dead headlamp, or socks that never dry can turn a great trip into a long lesson. Use the checklist below to plan confidently, pack for real conditions, and leave room for the good stuff: camp coffee, quiet mornings, and stories that improve every time you tell them.
Key Takeaways
- Plan for your trip, not a generic checklist: Match gear to weather, terrain, campsite access, group needs, and local rules.
- Cover the essentials first: Shelter, insulation, clothing layers, food, treated water, first aid, navigation, lighting, and communication.
- Carry a water-treatment method if you may use natural water; clear streams are not automatically safe to drink.
- Pack five days of meals and a reserve: Don’t rely on foraging, fishing, or finding supplies along the way.
- Car camping and backpacking need different lists: Bring comfort when you have vehicle access; prioritize weight and reliability when hiking.
- Test gear before leaving: Practice pitching the tent, using the stove and filter, and accessing offline maps.
- Share your route and return plan with someone you trust, and check official weather, closures, permits, and fire restrictions.
Table of Contents
- ⚡ Quick Tips and Facts for Five Days of Camping
- 🏕️ What “Survive Five Days of Camping” Really Means
- 🌲 Five-Day Camping Background: Plan for Your Campsite and Conditions
- Choose a Campground, Backcountry Site, or Dispersed Campsite
- Check Weather, Terrain, Rules, and Cell Coverage
- 🎒 The 15 Essentials to Bring for Five Days of Camping
- 1. Shelter: Tent, Footprint, and Stakes
- 2. Sleep System: Sleeping Bag, Pad, and Pillow
- 3. Clothing for Changing Weather
- 4. Food for Five Days, Plus an Emergency Buffer
- 5. Safe Drinking Water and Water Treatment
- 6. Cooking Gear, Stove Fuel, and Fire-Safety Supplies
- 7. First-Aid Kit and Personal Medications
- 8. Navigation: Map, Compass, and GPS
- 9. Lighting: Headlamp, Lantern, and Spare Batteries
- 10. Communication and Emergency Signaling
- 11. Sun, Insect, and Weather Protection
- 12. Hygiene and Toilet Supplies
- 13. Knife, Repair Kit, and Multitool
- 14. Waste Bags and Leave No Trace Supplies
- 15. Identification, Permits, and Essential Documents
- 🍽️ Five-Day Camping Food and Water Plan
- How Much Food and Drinking Water to Pack
- Meal Planning, Snacks, and Food Storage
- Keeping Food Safe from Wildlife
- 🧭 Safety Skills for a Five-Day Camping Trip
- Build and Maintain a Safe Campsite
- Prevent Hypothermia, Heat Illness, and Dehydration
- Respond to Injuries, Getting Lost, and Emergencies
- 🎒 Packing for Your Camping Style
- Car Camping Packing List
- Backpacking Packing List
- Family Camping, Kids, and Pet Gear
- 🌧️ Packing for Weather, Season, and Terrain
- Hot-Weather Camping
- Cold-Weather and Rainy Camping
- Mountain, Desert, and Forest Camping
- ✅ Five-Day Camping Checklist by Category
- ❌ What Not to Bring Camping
- 🧹 Before You Leave: Final Gear and Trip Checks
- Conclusion
- Recommended Links
- FAQ
- How much water should I bring for five days of camping?
- How much food do I need for a five-day camping trip?
- What is the most important survival gear to pack?
- How do I keep food cold or safe without a refrigerator?
- What should I pack for five days of camping in the rain?
- Can I camp for five days without a phone signal?
- How do I pack for five days of backpacking without carrying too much?
- Reference Links
⚡ Quick Tips and Facts for Five Days of Camping
The short answer to “What should I bring to survive 5 days of camping?” is: enough shelter, insulation, food, safe water, navigation, first aid, and communication to handle your actual route and conditions. “Survive” should mean prepared to manage foreseeable problems, not planning to live off berries and dramatic music.
If you’re camping with inflatable gear, start with our 12-Item Inflatable Camping Checklist 🏕️. For broader preparation, browse our Camping Preparation Guide and build your own trip list with the Camping Checklist™ app.
| Priority | What to plan for | Practical starting point |
|---|---|---|
| Water | Drinking, cooking, and cleaning | Carry water for the stretch between reliable sources, plus a suitable treatment method. The CDC recommends treating water from lakes, rivers, and springs. |
| Food | Five days of meals and snacks | Bring food you’ll actually eat, with a small emergency reserve. Backpackers need more compact, energy-dense choices than car campers. |
| Shelter and sleep | Rain, wind, cold ground, and overnight lows | Match your tent, sleeping bag, and pad to the forecast and terrain—not just the warmest part of the day. |
| Navigation and communication | Getting back on route or calling for help | Carry an offline map and compass; consider a satellite messenger where cellular coverage is unreliable. |
| Health and safety | Injury, weather, insects, sun, and fatigue | Pack first aid, personal medication, light, sun protection, and a plan shared with someone at home. |
Five quick rules from our campers:
- ✅ Check the forecast and local advisories before you leave, and again before entering remote areas.
- ✅ Treat water from natural sources. Clear water can still contain pathogens.
- ✅ Carry a paper map and know how to use it. A phone battery is not a navigation strategy.
- ✅ Pack layers and dry sleepwear. Damp clothes make a chilly night considerably less charming.
- ✅ Keep food, trash, and scented items stored as local regulations require. Wildlife doesn’t care that your trail mix was expensive.
- ❌ Don’t count on hunting, fishing, foraging, or a campfire for your basic needs. Carry the food and fuel you need, and follow local fire rules.
- ❌ Don’t assume “five days” means the same load for everyone. A family at a drive-in campground and a solo backpacker crossing high country need different kits.
One distinction shapes almost every item below: car camping lets you bring comfort; backpacking makes every ounce earn its place. We’ll explain how to choose without leaving behind the item you’ll wish you’d packed after dark.
🏕️ What “Survive Five Days of Camping” Really Means
A good five-day camping plan is not a contest to carry the most gear. It is a way to stay warm, hydrated, fed, oriented, and able to get help if the trip changes.
For an established campground with vehicle access, your risk plan might be as simple as checking weather, packing a first-aid kit, storing food correctly, and knowing where the nearest ranger station or road is. A remote backpacking trip requires more: route planning, reliable navigation, water-treatment capacity, emergency communication, and experience using your gear.
The National Park Service’s Ten Essentials guidance provides a useful starting point for day hikes and backcountry travel. For wilderness trips, the National Outdoor Leadership School (NOLS) wilderness medicine resources can help you understand why equipment and training belong together.
The difference between camping gear and survival gear
| Camping need | Everyday trip equipment | What it helps prevent or solve |
|---|---|---|
| Shelter | Tent, tarp or approved shelter, stakes | Exposure to rain, wind, and insects |
| Sleep | Sleeping bag or quilt, insulated sleeping pad | Heat loss to cold air and ground |
| Water | Bottles or reservoir, filter or treatment | Dehydration and waterborne illness |
| Food | Planned meals, snacks, emergency food | Low energy, poor decisions, and avoidable rationing |
| Navigation | Map, compass, downloaded map or GPS | Getting lost or unable to find a safe route |
| First aid | First-aid supplies and personal medication | Managing common injuries until help is available |
| Communication | Charged phone, whistle, satellite messenger when appropriate | Contacting help or signaling your location |
| Knowledge | Route, weather, fire, and gear skills | Using equipment effectively under stress |
A tool is only useful if you know how to use it. Practice pitching your tent, filtering water, operating your stove, and reading your map before the trip. As our team learned on a windy shoulder-season outing, the tent instructions are much easier to read at home than by headlamp while a rainfly tries to escape across camp.
Start with the trip, not the shopping cart
Before adding gear, answer these questions:
- Where are you going? Identify the campground, trail, water sources, exit routes, and nearby services.
- How are you getting there? Car camping, canoe camping, and backpacking impose very different packing limits.
- What conditions are plausible? Check overnight lows, precipitation, wind, elevation, and seasonal hazards.
- Who is going? Consider children, older adults, pets, medical needs, fitness, and experience.
- What rules apply? Check permits, fire restrictions, food-storage rules, water regulations, and closures.
For trip planning and packing templates, our Camping Preparation Guide and camping and hiking app guides can help you turn those answers into a checklist.
🌲 Five-Day Camping Background: Plan for Your Campsite and Conditions

There is no universal five-day packing list. Your environment, access, and activity determine what belongs in your pack. Five nights at a serviced campground may involve a cooler, chairs, and a larger tent. Five nights on a remote trail may require you to carry every meal, every layer, and your own treatment for natural water.
Our team plans in this order: place → weather → access → people → gear. It prevents a common mistake: choosing a shiny piece of kit before checking whether the campsite allows fires or the trail has a dependable water source.
Choose a campground, backcountry site, or dispersed campsite
| Camping style | Common advantages | Extra planning to do |
|---|---|---|
| Developed campground | Vehicle access, designated sites, sometimes toilets and potable water | Confirm what services are open, food-storage rules, and fire restrictions |
| Backcountry campsite | Fewer facilities and more solitude | Plan the route, water treatment, waste disposal, permits, and emergency communication |
| Dispersed camping | Often away from developed campgrounds | Check land-manager rules, access, road conditions, fire policy, and how to camp without facilities |
| Canoe or kayak camping | Gear can be distributed in boats | Protect equipment from water; secure boats and food; check weather and water conditions |
Use official land-manager information first. The National Park Service, U.S. Forest Service, and Bureau of Land Management publish site-specific regulations and alerts. A popular campsite listed online may be closed, permit-only, or subject to a fire ban. Verify before departure.
Check weather, terrain, rules, and cell coverage
A five-day forecast is a planning tool, not a promise. Look at overnight lows, wind, rain, heat, storms, snow, and elevation. Mountain weather can shift rapidly, while desert trips may involve extreme daytime heat and cold nights.
Before leaving:
- Check official park, forest, or land-management alerts.
- Confirm road and trail access, permits, and water availability.
- Find out whether campfires, stoves, bear canisters, or food lockers are required.
- Download maps for offline use and verify that your phone can access them without signal.
- Tell a trusted person your route, expected return time, and overdue plan.
- Decide how you’ll request help if your phone has no service.
The Federal Communications Commission’s emergency communications guidance explains why you shouldn’t assume ordinary mobile service will be available everywhere. If a route is remote, consider a satellite messenger such as the Garmin inReach Mini 2 and learn its functions before relying on it. An emergency device is not a substitute for judgment—or for telling someone where you’re going.
🎒 The 15 Essentials to Bring for Five Days of Camping
These are 15 functional categories, not a command to buy 15 new things. Some items can serve more than one purpose; others, especially medication and communication equipment, need a personal plan.
1. Shelter: Tent, Footprint, and Stakes
Bring a shelter suited to your campsite, expected weather, group size, and transport. A tent should have enough room for campers and the gear you need to keep dry. Backpackers may prefer a compact model such as the NEMO Hornet, while car campers may value more floor space and standing room.
Pack:
- Tent body, rainfly, poles, and stakes
- Groundsheet or footprint if appropriate for the tent
- Repair sleeve or compatible pole-repair kit
- Extra stakes suited to the terrain
- Tarp only if you know how and where it can be pitched safely
Practice setting it up before departure. Pitch it once in daylight, including the rainfly, then check that all parts are present. A tent that is easy to pitch at home is less likely to become a midnight puzzle.
Shelter trade-offs
- Lighter tent: easier to carry, often less spacious or durable.
- Larger tent: more room and comfort, but bulkier and slower to transport.
- Tarp shelter: versatile and light, but requires suitable anchor points and weather skills.
- Hammock system: comfortable in suitable terrain, but needs suspension, insulation beneath you, and often a rain tarp.
2. Sleep System: Sleeping Bag, Pad, and Pillow
A warm sleeping bag cannot do its full job without protection from the cold ground. Bring a sleeping bag or quilt, an insulated sleeping pad, and sleepwear that stays dry.
Check the bag’s temperature rating and rating standard, then compare it with expected overnight lows and your personal warmth needs. Many people sleep colder than they expect after a long day, especially when tired or damp. Look at the sleeping pad’s insulation rating as well; a thin, uninsulated pad can be uncomfortable in cold conditions.
Common options include:
- NEMO Disco sleeping bags for campers who like room to move.
- NEMO Tensor sleeping pads for lightweight, insulated sleep systems.
- A spare dry base layer and warm socks reserved for sleeping.
Don’t use a sleeping bag temperature rating as a guarantee of comfort. Treat it as one input, then allow for weather, pad insulation, clothing, shelter, and your own sleep style.
3. Clothing for Changing Weather
Pack clothing in layers rather than one bulky outfit:
- Base layer: moisture-managing shirt and bottoms for cold conditions.
- Insulating layer: fleece, wool, or another warm layer.
- Weather layer: waterproof or wind-resistant shell matched to the forecast.
- Camp and sleep clothing: dry clothes kept separate from hiking clothes.
- Footwear and socks: well-fitted shoes or boots, plus enough dry socks for the conditions.
Include a hat or beanie, sun hat, and gloves when the season or elevation warrants them. Cotton can feel clamy when wet and dry slowly; the American Hiking Society’s clothing guidance discusses why moisture management matters outdoors.
For a five-day trip, you usually don’t need five complete outfits. Rewear durable outer layers, pack clean underwear and socks according to comfort and conditions, and protect one dry sleeping layer.
4. Food for Five Days, Plus an Emergency Buffer
Plan five days of meals plus a modest reserve suited to your route and appetite. Your calorie needs depend on body size, activity, weather, and terrain. A long, steep backpacking day can require much more energy than a relaxed afternoon at a campground.
Good choices include:
- Oatmeal, granola, or other easy breakfasts
- Tortillas, crackers, nuts, dried fruit, and bars for snacks or lunch
- Rice, couscous, pasta, or shelf-stable meals for dinner
- Peanut butter, nut butter, hard cheese, or foil-packed fish where appropriate
- Tea, coffee, or other familiar comfort drinks
For backpackers, freeze-dried meals from Mountain House and Backpacker’s Pantry can save cooking and cleanup time. Try unfamiliar meals at home first—your trail is a poor place to discover that your stomach and a spicy dehydrated curry have differing opinions.
The Australian Hiker food guide estimates an author’s typical 10-day food supply at about 5.6 kg (12.4 lb), or roughly 560 g (1.2 lb) of dry food per day; scaled to five days, that example is about 2.8 kg (6.2 lb). That is one hiker’s example, not a universal allowance. The guide also emphasizes energy-dense foods and enjoyment: Australian Hiker, “Food on the Trail: A Beginner’s Guide”.
Food-planning checks
- Count breakfasts, lunches, dinners, snacks, and drinks for each person.
- Pack foods that tolerate heat and handling, or bring a properly managed cooler.
- Keep a reserve meal or substantial snack for delays.
- Carry food in approved wildlife-resistant storage where required.
- Don’t rely on foraging or fishing to replace planned meals.
See our Camping Food and Nutrition guides for more meal-planning ideas.
5. Safe Drinking Water and Water Treatment
Bring enough water for the journey between refill opportunities, plus equipment to treat water when you may need to use natural sources. A filter, chemical disinfectant, or boiling method must be appropriate for the water hazard and used as directed.
Options include:
- Sawyer Squeeze water filter for lightweight filtration.
- Katadyn BeFree water filter for a soft-flask-style system.
- Water-treatment tablets or drops as a backup, following label instructions.
- Durable bottles or a reservoir for carrying treated water.
Filters do not remove every possible chemical contaminant, and some devices do not address viruses. Review the CDC’s outdoor water-treatment advice and the manufacturer’s instructions. Do not assume a clear stream is safe to drink.
Water plan, step by step
- Check whether reliable potable water is available.
- Map natural sources and confirm they are likely to be accessible.
- Estimate your carrying needs for each leg, accounting for heat, exertion, and individual needs.
- Carry a treatment method suitable for the source and location.
- Treat according to instructions and protect clean water from contamination.
- Carry a backup treatment option if your primary filter could clog, freeze, break, or be lost.
The right amount to carry changes with temperature, exertion, and access. Avoid treating a single daily-water number as a guarantee; use route-specific advice and pay attention to your body.
6. Cooking Gear, Stove Fuel, and Fire-Safety Supplies
For a car-camping kitchen, bring a stove, cookware, utensils, fuel, a lighter or matches, and a way to clean up. Backpackers often prefer compact systems such as the Jetboil MiniMo or a small canister stove.
Before leaving:
- Check that the stove and fuel are compatible.
- Test the stove outdoors, following manufacturer instructions.
- Estimate fuel for meals and hot drinks, with a sensible reserve.
- Follow fire bans and local rules; a stove may also be restricted.
- Cook in an appropriate, well-ventilated location, never inside a tent or enclosed shelter.
A lighter is convenient; waterproof matches or a ferro rod can provide backup for campers who know how to use them. Fire-starting gear is not permission to light a fire. Check current rules and conditions through the land manager.
7. First-Aid Kit and Personal Medications
Bring a kit suited to the group, remoteness, and trip activities. Include supplies for common minor problems and any personal medical needs. A basic kit may contain:
- Adhesive bandages and sterile dressings
- Blister-care supplies
- Medical tape and gauze
- Antiseptic wipes or another appropriate cleaning method
- Twezers and small scissors
- Disposable gloves
- Any prescribed medication, packed securely
- Emergency contact and medical information
The American Red Cross first-aid resources can help you review basic preparedness. A first-aid kit cannot replace training, and serious injury requires appropriate emergency help. If you have allergies, asthma, diabetes, or another health condition, make a specific plan with your healthcare professional.
Do not pack medication based on somebody else’s advice. Bring what you need, store it according to its instructions, and make sure another responsible person knows where it is.
8. Navigation: Map, Compass, and GPS
Bring a map that covers your route and a compass, then learn the basics before you go. A phone app is helpful, but can fail when a battery dies, a device gets wet, or you lose signal. A GPS or watch can add convenience, but it is not a replacement for understanding the route.
- Save maps offline.
- Carry a paper map protected from moisture.
- Mark trail junctions, water sources, campsites, and exit routes.
- Check your position before you need to make a difficult decision.
- Tell someone your route and expected return time.
Our Camping and Hiking Apps guides cover digital planning tools. The National Park Service’s Ten Essentials page also includes navigation as a core preparedness category.
9. Lighting: Headlamp, Lantern, and Spare Batteries
Bring a headlamp for hands-free tasks, with spare batteries or a charged backup. A lantern is useful for car camping but is usually optional for backpackers.
Use lights for:
- Setting up or packing camp in darkness
- Finding the toilet or trail safely
- Cooking and first aid
- Signaling, if appropriate and visible
Test your headlamp before leaving. If it charges by USB, bring the correct cable and a power bank if needed. A light that works only when the battery indicator is feeling optimistic is not much of a safety plan.
10. Communication and Emergency Signaling
Carry a charged phone in a protective case, but don’t treat cell service as guaranteed. A whistle is light and useful for signaling; remote travel may justify a satellite messenger or personal locator beacon, depending on route, coverage, and your plan.
Before departure:
- Share your route and return deadline with someone.
- Agree on what that person should do if you’re overdue.
- Learn how your emergency device sends a message or alert.
- Keep devices charged and accessible.
- Know the local emergency number and park or land-manager contact details.
A device helps only if you can reach it and know how it works. Practice sending a test message as instructed by its maker.
11. Sun, Insect, and Weather Protection
Pack protection that matches the region and season:
- Sunscreen and sunglasses
- A brimed hat or other sun-protective clothing
- Insect repellent appropriate to local risks
- Rain shell and warm layer
- Lip protection and any personal skin-care needs
The CDC’s sun-safety guidance recommends practical protection including shade, protective clothing, and sunscreen. For insect-borne risks, check local public-health advice and use products according to their labels.
12. Hygiene and Toilet Supplies
Bring a toothbrush, toothpaste, hand sanitizer, toilet paper or a permitted alternative, and any necessary menstrual or personal-care supplies. For backcountry travel, check local rules for human waste and carry a trowel only where allowed and appropriate.
Pack out used hygiene products and trash when required. Never assume a campground has toilet paper, soap, or open facilities. Confirm services before departure.
The Leave No Trace Center for Outdoor Ethics outlines practices for disposing of waste and protecting natural areas.
13. Knife, Repair Kit, and Multitool
A small knife or multitool can help with food packaging and minor repairs. Add a compact repair kit that suits your gear: duct tape, tent-pole repair supplies, cord, and patches for inflatables or sleeping pads.
A blade is optional for many campground trips and requires safe handling. Axes and saws are not everyday essentials for most campers. Use them only where legal, necessary, and within your skill level. The 5 Day Outdoor Survival Basics 101 course emphasizes tool safety alongside fire, shelter, water, navigation, and signaling; see The Survival University’s course details.
14. Waste Bags and Leave No Trace Supplies
Bring durable bags for trash, food scraps, and wet or dirty items. Follow local requirements for human waste, wastewater, and food storage.
The Leave No Trace Center’s seven principles include planning ahead, disposing of waste properly, and respecting wildlife. In plain terms: pack out what you pack in, keep food secure, and leave the site ready for the next camper.
15. Identification, Permits, and Essential Documents
Pack identification, reservations, permits, vehicle details, emergency contacts, and any required licenses. Keep digital copies available offline where useful, but carry essential documents in a waterproof sleeve if needed.
Before you leave, verify that permits match your dates and route. A reservation confirmation is handy; a printed backup can be even handier when your phone is wet, dead, or buried beneath snacks.
🍽️ Five-Day Camping Food and Water Plan
A reliable meal plan prevents both food shortages and the familiar “we packed six breakfasts and somehow no lunch” situation. The right plan depends on whether you can use a cooler, whether water is available, and how much weight you can carry.
How much food and drinking water to pack
There is no single calorie target or water quantity that fits every camper. Food needs rise with activity, cold, and exertion; water needs rise with heat and effort. Use personal experience, route-specific information, and professional guidance where appropriate.
| Trip situation | Food strategy | Water strategy |
|---|---|---|
| Car campground with potable water | Pack planned meals and snacks; keep perishables chilled as directed | Carry a bottle and refill at approved sources |
| Backcountry route with known sources | Pack lightweight, durable meals for each day and a reserve | Carry water between sources and treat natural water |
| Hot, strenuous, or high-elevation trip | Plan extra accessible snacks and meals | Assess water access carefully; do not rely on a generic estimate |
| Remote route with uncertain sources | Carry a larger contingency plan and consider changing the route | Reassess whether the trip is appropriate if water cannot be secured safely |
For backpacking, Australian Hiker’s example of around 560 g of dry food person per day gives a useful comparison point, not a rule. The author notes that hiking energy needs can be substantial and suggests calorie-dense ingredients such as nuts and nut buters. Read the full trail-food guide and adjust for your own appetite, activity, and trip.
A simple five-day meal-planning method
- Write down five breakfasts, five lunches, five dinners, and snacks for each person.
- Match meals to your schedule: quick food for hiking days, slower cooking when you have time.
- Choose familiar foods and include variety.
- Remove packaging at home where safe and practical.
- Add a reserve meal or extra snack for delays.
- Store food according to temperature and wildlife requirements.
- Review the plan against available water and fuel.
Meal planning, snacks, and food storage
A simple menu might look like this:
| Meal | Car-camping example | Backpacking example |
|---|---|---|
| Breakfast | Oatmeal, eggs in a cooler, or cereal | Instant oats with powdered milk and dried fruit |
| Lunch | Sandwiches, wraps, or shelf-stable snacks | Tortillas, nut butter, hard cheese where suitable, or pouch fish |
| Dinner | Pasta, rice, or a stove-top meal | Couscous or a freeze-dried meal |
| Snacks | Fruit, crackers, bars, trail mix | Nuts, dried fruit, bars, chocolate |
| Drinks | Coffee, tea, water | Drink mix, tea, or coffee if desired |
Australian Hiker recommends carrying foods that are light, durable, and enjoyable, with options such as oats, couscous, dried fruit, nuts, and freeze-dried meals. The guide’s memorable advice is: “Life’s too short to eat food you don’t enjoy.” We agree. A five-day menu should be practical, but it shouldn’t feel like a punishment.
For more meal ideas, visit Camping Food and Nutrition. To compare stove, cookware, and food-storage equipment, explore Camping Gear Reviews.
Keeping food safe from wildlife
Use a cooler for perishable food when you can keep it safely cold, and follow local rules for bear-resistant containers, lockers, or hanging systems. Do not leave food or scented items inside a tent where wildlife could reach them.
- Store food, toiletries, and rubbish as required by the site.
- Keep cooking and eating areas clean.
- Avoid bringing more perishables than your cooler can manage.
- Wash hands or use sanitizer before handling food.
- Never feed wildlife.
The National Park Service food-storage guidance explains why proper storage matters in bear country. Regulations vary by location, so the local land manager’s instructions take priority.
🧭 Safety Skills for a Five-Day Camping Trip
Equipment helps, but the strongest safety system is good planning plus practiced skills. You don’t need to become a wilderness survival instructor to camp for five days. You do need to recognize when conditions are changing and know how to respond.
Build and maintain a safe campsite
Choose a site permitted for camping and avoid places exposed to flooding, falling branches, or unnecessary environmental damage. Keep cooking and fire activities within designated areas and follow current restrictions.
At camp:
- Keep tent exits clear.
- Store food and scented items correctly.
- Keep fuel and flame away from sleeping areas.
- Secure loose gear before wind or rain.
- Know where water, toilets, and emergency contacts are located.
- Keep a headlamp accessible at night.
The Leave No Trace principles provide practical guidance for reducing your impact and avoiding common campsite mistakes.
Prevent hypothermia, heat illness, and dehydration
Watch for changes in yourself and your group. Shivering, confusion, unusual fatigue, headache, dizziness, nausea, and poor coordination can be warning signs of serious illness or exposure. Stop, get out of the weather, add or remove layers as appropriate, and seek help when symptoms are severe or worsening.
The CDC’s heat-health information describes risks and prevention steps for hot conditions. For cold exposure and wilderness medical concerns, consult training resources such as NOLS Wilderness Medicine.
Practical prevention:
- Adjust pace and clothing before you become soaked with sweat.
- Keep a dry layer available for camp.
- Take breaks and drink according to conditions and your needs.
- Use shade and sun protection in exposed terrain.
- Turn around if weather, symptoms, or route conditions make continuing unsafe.
Respond to injuries, getting lost, and emergencies
If an incident occurs, pause before making the problem bigger:
- Stop in a safe place and assess the people, weather, and surroundings.
- Provide basic first aid within your training.
- Protect the injured or unwell person from further exposure.
- Use your map and known landmarks to establish your location.
- Contact emergency services or use your satellite device when needed.
- Follow your overdue plan and avoid splitting up unnecessarily.
If you realize you’re off route, don’t keep walking simply because the trail “must be nearby.” Stop, check the map, orient yourself, and make a deliberate plan. If you’re uncertain or conditions are worsening, seeking help early is usually safer than waiting until batteries, daylight, or energy run out.
Survival skills complement supplies
The Survival University’s 5 Day Outdoor Survival Basics 101 course describes hands-on training in tools, fire, shelter, water, navigation, signaling, and introductory wilderness first aid. Its course overview says, “By the end of the week, you’ll have the confidence to walk into the backcountry knowing you can keep yourself alive and get yourself home.” That’s a useful perspective on preparedness: a kit is stronger when paired with training. See the course outline.
Do not confuse survival techniques such as trapping, hunting, or foraging with dependable meal planning. They require skill, legal access, and uncertain results. Bring food you can rely on.
🎒 Packing for Your Camping Style
The same five days can mean one big car-camping tote or a carefully balanced backpack. We recommend making one master checklist, then adding or removing items for each trip style.
Car Camping Packing List
Vehicle access lets you prioritize comfort and redundancy. Consider bringing:
- Larger tent, sleeping pads, and bedding
- Cooler and food-storage containers
- Camp chairs and table, if useful
- Larger stove and cookware
- Lantern plus headlamps
- Extra water containers
- Spare clothing and rain gear
- Basic tool and repair kit
- Games, books, or activities for downtime
Don’t let the trunk become a gear avalanche. Keep emergency essentials, medications, and lighting where you can reach them without unloading everything.
Backpacking Packing List
For a five-day backpacking trip, prioritize items that are light, reliable, and multi-use:
- Correctly sized pack
- Lightweight tent or shelter
- Sleeping bag or quilt suited to expected lows
- Insulated pad
- Layered clothing and rain protection
- Map, compass, and downloaded maps
- Water containers and treatment
- Planned food and fuel
- Headlamp and spare power
- First aid, emergency communication, and repair supplies
The Backpacking Gear Basics category can help you compare essential equipment. For trip-specific gear reviews, see Camping Gear Reviews.
One video’s lightweight five-day perspective
The featured video presents a lightweight backpacking setup with an Osprey Stratus 34-liter pack, NEMO sleeping gear, a NEMO Hornet tent, a Jetboil Mini system, a Garmin inReach Mini, and a Sawyer Squeeze. It also includes a headlamp, first-aid kit, trowel, and bear canister where required.
That’s one presenter’s kit, not a universal packing prescription. The right backpack volume and shelter depend on your gear, body fit, route, weather, and resupply options. The presenter’s reminder to bring an extra pair of socks is especially practical: wet or uncomfortable feet can turn a good trip into an increasingly grumpy one.
Family Camping, Kids, and Pet Gear
For families, organize by person and activity rather than relying one giant shared bag. Add:
- Clothing layers for each child, plus a dry backup
- Familiar snacks and meals
- Child-sized sleep gear where needed
- Medication and emergency contact details
- Games, books, or simple activities
- Pet food, leash, waste bags, water bowl, and required records
Check age limits, campground rules, and nearby medical services. For pets, bring enough food for the trip and secure them according to site rules. Children and pets need their own water, warmth, and safety plan, not just a share of the adult supplies.
🌧️ Packing for Weather, Season, and Terrain
Hot-Weather Camping
Plan for shade, sun protection, water access, and safe food storage. Carry breathable clothing, a hat, sunscreen, and an appropriate insect repellent. Avoid leaving perishable food in a hot vehicle or cooler that is no longer cold enough to keep it safe.
Check local heat advisories and be willing to change the route or timing. The CDC heat guidance offers prevention information for outdoor activity.
Cold-Weather and Rainy Camping
Bring a weatherproof shell, insulating layer, dry sleep clothing, and an insulated sleeping pad. Keep dry essentials in waterproof bags and pitch the shelter where water will drain away, following campground rules and terrain safety.
Cold-weather trips demand more than a warm bag: your shelter, pad, clothing, food, and experience all matter. Check forecasts and seasonal hazards through official local sources. Do not set a stove or flame inside a tent for warmth; carbon monoxide and fire risks make that dangerous.
Mountain, Desert, and Forest Camping
| Terrain | Planning priorities |
|---|---|
| Mountains | Rapid weather changes, cold nights, elevation, route-finding, and exposed terrain |
| Desert | Heat, sun exposure, limited water, cold overnight temperatures, and long distances between services |
| Forest | Insects, wet conditions, falling branches, wildlife, and local fire restrictions |
| Coastal areas | Wind, tide and shoreline conditions, salt exposure, and changing weather |
Confirm local conditions and regulations before you leave. A forecast for the nearest town may not reflect the campsite’s elevation, exposure, or terrain.
✅ Five-Day Camping Checklist by Category
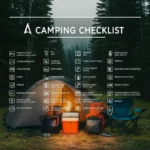
Use this as a starter list, then adapt it in the Camping Checklist™ app or with a printable checklist.
| Category | Five-day trip checklist |
|---|---|
| Shelter | Tent or permitted shelter, rainfly, stakes, groundsheet if needed, repair supplies |
| Sleep | Sleeping bag or quilt, insulated pad, pillow if desired, dry sleepwear |
| Clothing | Base layers, insulating layer, rain shell, hiking clothes, socks, hat, suitable footwear |
| Food | Five-day meal plan, snacks, emergency food, cooler if needed |
| Water | Bottles or reservoir, treatment method, backup treatment where appropriate |
| Cooking | Stove, compatible fuel, cookware, utensils, lighter or matches, cleaning supplies |
| Safety | First-aid kit, personal medication, map, compass, light, whistle, emergency contacts |
| Communication | Charged phone, power bank if needed, satellite device where appropriate |
| Protection | Sunscreen, sunglasses, insect repellent, weather layers |
| Hygiene | Toothbrush, toothpaste, hand sanitizer, toilet supplies, personal-care items |
| Wildlife and waste | Required food storage, trash bags, waste supplies |
| Documents | ID, reservations, permits, route information, licenses if needed |
For inflatable gear, cross-check with our 12-Item Inflatable Camping Checklist 🏕️.
❌ What Not to Bring Camping
Skip items that add weight, create risk, or rely on assumptions:
- Unecessary duplicates: one reliable light and a backup is often more useful than a pile of gadgets.
- Untested gear: learn your stove, filter, tent, and navigation tools before the trip.
- Food that needs refrigeration when you can’t keep it cold: choose shelf-stable alternatives.
- A large blade or axe you don’t know how to use: safety and local rules matter.
- A phone-only navigation plan: batteries fail and coverage disappears.
- Fragile items without protection: water and rough handling are routine outdoors.
- Excessive clothing: pack layers and a dry backup, not an outfit for every hour.
- A plan to forage or hunt for survival food: laws and results vary, and it should never replace planned meals.
- Campfire gear during a fire ban: check restrictions and use only permitted cooking methods.
A short packing list is not automatically a better packing list. The goal is to remove unecessary weight, not essential safety margins.
🧹 Before You Leave: Final Gear and Trip Checks
Run through these checks the day before departure:
- Check forecast, alerts, closures, and fire restrictions.
- Confirm permits, reservations, access, and water sources.
- Test the stove, filter, headlamp, power bank, and communication device.
- Pitch the shelter or confirm all tent parts are packed.
- Count five days of meals and snacks for every person.
- Pack personal medication and emergency details.
- Download maps and share your route and return plan.
- Pack food-storage and waste supplies required at your destination.
- Put critical items where you can reach them quickly.
- Leave a trusted person your route, expected return time, and overdue instructions.
A camping checklist app helps because it turns planning into repeatable steps: save gear categories, customize lists for different trips, and avoid rebuilding the same checklist every time. Our Camping Preparation Guide and Camping and Hiking Apps pages offer more ways to organize the details.
And what about the item that feels easiest to forget? For many of us, it isn’t a fancy survival tool. It’s the small, personal comfort that makes five nights more manageable: dry socks, a familiar snack, or the medication you use every day. Check the list one last time, then go enjoy the outdoors.