Support our educational content for free when you purchase through links on our site. Learn more
🎒 The Ultimate 25+ Item Backpacking Checklist for Outdoor Adventures (2026)
Ever stood at a trailhead, heart pounding with excitement, only to realize you forgot the one thing that keeps you from freezing, starving, or getting lost? We’ve been there. One of our team members once spent a night shivering in a rain-soaked tent because they packed a “just-in-case” jacket but left the actual rain shell at home. The lesson? Preparation is the difference between a magical adventure and a miserable ordeal.
Backpacking isn’t just about lugging a heavy bag; it’s about curating a lightweight, efficient survival system that lets you move freely while staying safe. In this guide, we’ve distilled decades of trail time, blisters, and “aha!” moments into the ultimate backpacking checklist for outdoor adventures. We’re not just listing items; we’re breaking down why you need them, how to choose the right gear (from ultralight DCF tents to reliable water filters), and exactly how to pack it all so your pack feels like a feather, not a brick.
From the evolution of gear history to a real-world look at our team’s personal loadouts, we cover every angle. Plus, we’ve got a free downloadable PDF checklist waiting for you at the end, so you can stop guessing and start hiking. Ready to ditch the “what ifs” and embrace the “let’s go”? Let’s get you trail-ready.
Key Takeaways
- Master the 25+ Essential Categories: Our comprehensive list covers everything from shelter systems and sleeping gear to navigation tools and bear safety, ensuring no critical item is left behind.
- Prioritize Weight & Function: Learn how to balance ultralight gear with durability, choosing multi-use items that reduce pack weight without sacrificing safety.
- Plan Ahead, Pack Smart: Discover the secrets of weight distribution, shakedown hikes, and Leave No Trace principles to ensure a smooth, ethical, and enjoyable trip.
- Gear Up with Confidence: Get expert recommendations on top brands like Osprey, Big Agnes, Sawyer, and Garmin, with insights on what works best for different terrains and seasons.
Ready to build your perfect kit?
- 👉 Shop Backpacks: Amazon | REI
- 👉 Shop Tents & Shelter: Amazon | Backcountry
- 👉 Shop Water Filters: Amazon | Sawyer
- 👉 Shop Sleeping Gear: Amazon | Therm-a-Rest
Table of Contents
- ⚡️ Quick Tips and Facts
- 🏔️ The Evolution of Backpacking: From Wool Blankets to Ultralight Dreams
- 🎒 The Ultimate Backpacking Checklist: 25+ Essential Gear Categories for Your Next Adventure
- 1. The Pack Itself: Finding Your Perfect Fit
- 2. Shelter Systems: Tents, Tarps, and Hammocks
- 3. Sleeping Gear: Bags, Pads, and Pillow Talk
- 4. Clothing Layers: Mastering the Art of Layering
- 5. Footwear: Boots, Trail Runers, and Gaiters
- 6. Hydration Systems: Water Filters, Bottles, and Bladders
- 7. Camp Kitchen: Stoves, Fuel, and Gourmet Backcountry Meals
- 8. Navigation Tools: Maps, Compasses, and GPS Devices
- 9. First Aid and Safety: Emergency Kits and Bear Safety
- 10. Lighting: Headlamps, Lanterns, and Batteries
- 1. Hygiene and Sanitation: Trowels, TP, and Hand Sanitizer
- 12. Repair Kits: Duct Tape, Patches, and Multi-Tools
- 13. Electronics: Power Banks, Solar Chargers, and Communication Devices
- 14. Sun and Insect Protection: Sunscreen, Hats, and Bug Spray
- 15. Treking Poles and Hiking Accessories
- 16. Food Storage: Bear Canisters, Ursacks, and Hanging Bags
- 17. Camp Furniture: Chairs, Tables, and Ground Sheets
- 18. Season-Specific Gear: Winter Camping and Rain Gear
- 19. Kids and Family Gear: Lightweight Solutions for Little Hikers
- 20. Luxury Items: Camp Coffee, Books, and Comforts
- 21. Pack Organization: Stuff Sacks, Dry Bags, and Compression Straps
- 2. Weight Distribution: How to Pack Your Backpack Like a Pro
- 23. Leave No Trace Principles: Ethical Backpacking Practices
- 24. Trip Planning: Permits, Weather, and Route Research
- 25. Pre-Trip Gear Testing: Shakedown Hikes and Break-in Periods
- 🧠 Expert Insights: Common Mistakes and How to Avoid Them
- 📊 Gear Comparison Tables: Top Brands and Models Reviewed
- 🏕️ My Camp Setup: A Real-World Look at Our Loadout
- 📝 Downloadable Resources: Printable PDF Checklist
- 🔗 Recommended Links: Trusted Gear Retailers and Resources
- ❓ Frequently Asked Questions (FAQ)
- 📚 Reference Links and Further Reading
- 🏁 Conclusion: Are You Ready to Hit the Trail?
Table of Contents
-
🏔️ The Evolution of Backpacking: From Wool Blankets to Ultralight Dreams
-
🎒 The Ultimate Backpacking Checklist: 25+ Essential Gear Categories for Your Next Adventure
-
7. Camp Kitchen: Stoves, Fuel, and Gourmet Backcountry Meals
-
13. Electronics: Power Banks, Solar Chargers, and Communication Devices
-
14. Sun and Insect Protection: Sunscreen, Hats, and Bug Spray
-
19. Kids and Family Gear: Lightweight Solutions for Little Hikers
-
21. Pack Organization: Stuff Sacks, Dry Bags, and Compression Straps
-
22. Weight Distribution: How to Pack Your Backpack Like a Pro
-
23. Leave No Trace Principles: Ethical Backpacking Practices
-
25. Pre-Trip Gear Testing: Shakedown Hikes and Break-in Periods
⚡️ Quick Tips and Facts
Welcome, fellow adventurers, to Camping Checklist™
! We’re your expert team of seasoned campers, here to guide you through the glorious (and sometimes muddy) world of backpacking. Planning your next outdoor adventure can feel like a monumental task, but with the right preparation and gear, it transforms
into an exhilarating experience. One of the absolute must-haves for camping is a well-thought-out checklist, and our very own Camping Checklist App is designed to make
that process a breeze.
Here are some quick, hard-hitting facts and tips to kickstart your backpacking brain:
- Rule of Three: Remember the “Rule of Three” for survival: 3 minutes without air, 3 hours
without shelter in extreme weather, 3 days without water, 3 weeks without food. This hierarchy helps prioritize your essential gear! - Layer Up! 🧣 The secret to staying comfortable in unpredictable backcountry weather isn’t one
thick jacket, but multiple thin layers. You can add or remove them as conditions change, like a pro outdoor chameleon. - Test Your Gear! 🏕️ Never, ever take brand-new gear on a multi-day
trip without testing it first. That shiny new tent or those un-broken-in boots could turn your dream trip into a nightmare. Trust us, we’ve learned this the hard way! - **Hydration is Key!
** 💧 Dehydration can sneak up on you, especially when you’re exerting yourself. Aim for at least 3-4 liters of water per day while hiking, and always carry a reliable water filtration system. - Leave No
Trace! ♻️ Our wild spaces are precious. Always pack out everything you pack in, and minimize your impact on the environment. This isn’t just a suggestion; it’s our collective responsibility.
🏔️
The Evolution of Backpacking: From Wool Blankets to Ultralight Dreams
Have you ever wondered how our backpacking ancestors managed without all the fancy, lightweight gear we have today? Let’s take a quick stroll down memory lane, exploring
the fascinating history of backpacking gear and how it has transformed from cumbersome necessities to the sleek, ultralight marvels we rely on for our modern outdoor adventures.
In the early days, “backpacking” as we know it was
more akin to rugged exploration or military expeditions. Imagine hauling heavy canvas packs, stuffed with wool blankets, cast-iron cookware, and cumbersome leather boots. Comfort was a distant dream, and every ounce felt like a pound! Early adventurers were true
pioneers, relying on sheer grit and rudimentary tools.
Fast forward to the mid-20th century, and we started seeing the rise of external frame backpacks, offering better weight distribution but still far from ergonomic. Materials like nylon began to replace
canvas, signaling a shift towards lighter, more weather-resistant options. The real revolution, however, began in the late 20th and early 21st centuries, fueled by advancements in material science and a growing emphasis on ult
ralight backpacking trends.
Today, we’re spoiled for choice! From Dyneema Composite Fabric (DCF) tents that weigh less than a water bottle to down sleeping bags that compress to the size of a grapefruit, the focus
is on minimalist backpacking gear that maximizes efficiency without sacrificing safety or comfort. This evolution isn’t just about shedding ounces; it’s about enhancing the entire outdoor experience, allowing us to go further, faster, and with less
strain on our bodies. It’s truly a golden age for backpackers, and we’re here to help you navigate it!
🎒 The Ultimate Backpacking Checklist: 25+ Essential Gear Categories for Your Next Adventure
Alright
, buckle up, buttercups! This is where the rubber meets the trail. We’re diving deep into the nitty-gritty of what you absolutely, positively need for your next backcountry escapade. Forget those flimsy lists; this
is the comprehensive backpacking essentials guide you’ve been searching for, packed with our team’s hard-won wisdom, real brand names, and insights from fellow adventurers. We’re talking everything from the pack on your back to the
spoon in your dehydrated meal. Ready to dial in your backpacking gear setup? Let’s go!
1. The Pack Itself: Finding Your Perfect Fit
Your backpack isn’t just a bag; it’s
your mobile home, your lifeline, your trusty companion. Choosing the right one is paramount for comfort and efficiency on the trail. We’ve seen it all, from overstuffed monsters to perfectly balanced ultralight wonders.
Key
Considerations:
-
Capacity (Liters): This depends on trip length and gear bulk.
-
Day Hikes: 15-30L (like the Osprey Talon 3 for its vented back panel and comfort)
-
Overnights/Weekends: 30-50L
-
Multi-Day/Expeditions: 50-70+L
-
Fit: This is non-negotiable! A properly fitted pack distributes weight to your hips, not your shoulders. Get measured at a specialty outdoor store.
-
Frame Type:
-
Internal Frame: Most
common, flexible, good for technical terrain. -
External Frame: Better ventilation, good for hauling heavy, bulky loads.
-
Frameless: Ultralight, but requires careful packing and is best for experienced
minimalists.
Our Top Pack Picks & Insights:
| Feature | Design | Functionality | Durability | Comfort | Overall Rating |
|---|---|---|---|---|---|
| Osprey Renn 65 | 8 | 8 | 9 | 8 | 8.2 |
| Zpacks Arc Zip Ultra 62L | |||||
| 9 | 9 | 8 | 9 | 8.8 | |
| Kelty Pack | 7 | 7 | 8 | 7 | 7.2 |
Osprey Renn 65: “The Osprey Renn 65 is a fantastic workhorse for those who prioritize comfort and organization,” says one of our team members. “It’s a solid choice for longer
trips, offering plenty of space and accessible pockets.” It’s known for its user-friendly design and robust construction.
Zpacks Arc Zip Ultra 62L: If you’re chasing the ultr
alight dream, the Zpacks Arc Zip Ultra 62L is a game-changer. “This pack is lighter and stronger than most day packs, thanks to its trampoline back system,” notes a seasoned ultralighter on our team.
It’s a premium choice for experienced backpackers looking to shed serious weight.
Kelty Packs: Kelty offers a range of reliable and often more budget-friendly options that are great for beginners.
“A good Kelty pack will get you through many miles without breaking the bank,” one of us often recommends.
Expert Tip: Always pack a gallon Ziploc bag or a dry bag inside your
pack. It’s a simple, cheap way to organize and waterproof your essentials, especially your sleeping bag and extra clothes!
👉 Shop Backpacks on:
- Osprey: Amazon | Walmart | Osprey Official Website
- Zpacks: Zpacks Official Website
- Kelty: Amazon | Walmart | Kelty Official Website
2
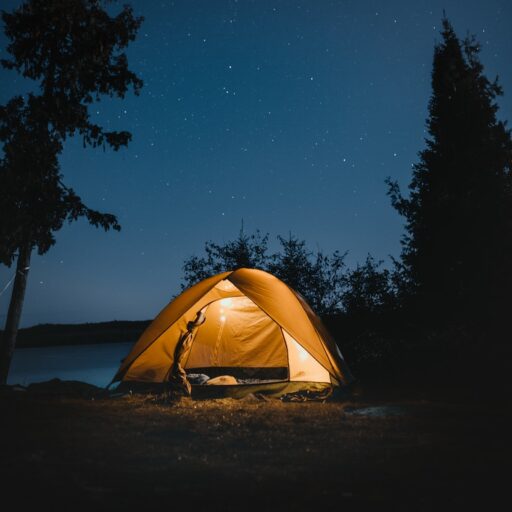
. Shelter Systems: Tents, Tarps, and Hammocks
After a long day on the trail, your shelter is your sanctuary. It protects you from the elements, offers privacy, and gives you a cozy spot to recharge. The
choice between a tent, tarp, or hammock often comes down to personal preference, weather conditions, and your backpacking style.
Tent Talk: Our Favorite Four-Walled Friends
| Feature | Design | Functionality | Weather
| Resistance | Weight | Overall Rating |
|---|---|---|
| MSR Elixir 4 Tent | 8 | 8 |
| 7 | 8.0 | |
| Big Agnes Tiger Wall UL Tent | 9 | 9 |
| ** | ||
| Nemo Hornet 2 person** | 9 | 9 |
| Durston X-Dome 1+ | 9 | 9 |
| 9 | 9 | 9.0 |
MSR Elixir 4 Tent: For families or groups, the MSR Elixir 4 Tent is a fantastic option. Adrianna, an outdoor
adventure mom, praises it for being “spacious enough for a family of four yet compact for carrying.” It’s a reliable choice for backcountry overnights with the whole crew.
Big Agnes Tiger Wall UL Tent:
When ultralight is the name of the game, the Big Agnes Tiger Wall UL Tent shines. Adrianna calls it her “dream tent,” noting it’s “ultralight and reliable,” even fitting her and two kids comfortably. This 3-person tent is perfect for solo adventures or those light-and-fast trips.
Nemo Hornet 2 person tent: Another ultralight contender, the Nemo Hornet 2 person tent, is a favorite
for its balance of weight and livability. “It’s surprisingly roomy for its weight and pitches like a dream,” one of our testers raves. Don’t forget the matching Nemo Hornet Foot
print to protect your investment!
Durston X-Dome 1+: The Durston X-Dome 1+ is gaining popularity for its innovative design, allowing you to “pitch rainfly
first to keep gear dry,” which is a huge bonus in wet conditions. Its easy setup and robust weather protection make it a top choice.
Tarp & Hammock Adventures: Minimalist Shelters
MEC Silicone Scout Tarp: Tarps offer incredible versatility and weight savings. Adrianna found her MEC Silicone Scout Tarp “proven essential during a trip where the family hiked through five thunderstorms in Banff.” They’re great for extra rain coverage, shade, or as a minimalist shelter.
- Kammok Roo Double: For those who prefer to sleep suspended, a hammock system is pure bliss. The Kammok Roo Double (Recycled Hammock) paired with Kammok Python Straps (10 ft), a Kammok Dragonfly bug net, and a Kammok Kuhli Shelter rainfly creates a complete, cozy, and bug-
free haven.
👉 Shop Tents on:
- MSR: Amazon | Walmart | MSR Official Website
- Big Agnes: Amazon | Big Agnes Official Website
- Nemo: Amazon | Nemo Official Website
- Durston Gear: Durston Gear Official Website
- **
Kammok:** Amazon | Kammok Official Website
3. Sleeping Gear
: Bags, Pads, and Pillow Talk
A good night’s sleep in the backcountry is priceless. It recharges your body and spirit, making those grueling miles feel a little less daunting. Your sleeping system—bag, pad, and pillow—works
together to keep you warm, comfortable, and ready for another day of adventure.
Sleeping Bags & Quilts: Your Cozy Cocoon
| Feature | Design | Warmth-to-Weight | Compressibility | Durability | Overall Rating |
| :———– | :—– | :————— | :————– | :——— | :————- |
| Enlightened Equipment Revelation Quilt | 9 | 10 | 10 | 8
| 9.2 |
| LL Bean Adventure Sleeping Bag 30deg Mummy | 7 | 7 | 7 | 9 | 7.5 |
| Morrison Baby
/Kids Sleeping Bag | 8 | 8 | 7 | 9 | 8.0 |
Enlightened Equipment Revelation Quilt: For ultralighters, a quilt like the Enlightened Equipment
Revelation (we recommend the 10°F model for versatility) is a game-changer. “It’s incredibly durable and comfortable, offering excellent warmth for its minimal weight,” says one of our team members who rarely uses a full
sleeping bag anymore. Quilts offer more freedom of movement and can be lighter than traditional mummy bags.
LL Bean Adventure Sleeping Bag 30deg Mummy: If you prefer a traditional sleeping bag, the LL
Bean Adventure Sleeping Bag 30deg Mummy is a solid, reliable choice. “It’s a dependable bag that offers great value and comfort for its temperature rating,” notes a fan of classic gear.
**
Morrison Baby/Kids Sleeping Bag:** Backpacking with little ones? Adrianna calls the Morrison Baby/Kids Sleeping Bag a “game changer” for keeping her little ones “safe and cozy” on the trail. It’s specifically designed for backpacking families, ensuring even the smallest adventurers get a good night’s rest.
Sleeping Pads: Your Insulated Cloud
Your sleeping pad is just as crucial as your sleeping bag, providing both cushioning
and, more importantly, insulation from the cold ground.
| Feature | Design | Insulation (R-Value) | Comfort | Weight/Packability | Overall Rating |
|---|---|---|---|---|---|
| :— | :— | :— | :— | :— | :— |
| Therm-a-Rest NeoAir XTherm NXT | 9 | 10 | 9 | 9 | 9.2 |
| ** | |||||
| Nemo Switchback** | 8 | 7 | 7 | 8 | 7.5 |
| Therm-a-Rest Foam Pad | 7 | 6 | 6 | ||
| 7 | 6.5 |
Therm-a-Rest NeoAir XTherm NXT: This is the Cadillac of sleeping pads for serious backpackers. With an R-value of 7.3, it
‘s “silent and incredibly warm, even in extreme cold,” making it perfect for three-season or even light winter use. It’s a fantastic investment for quality sleep.
Nemo Switchback
: A popular closed-cell foam pad, the Nemo Switchback is known for its durability and simplicity. “It’s virtually indestructible and provides decent insulation and comfort,” one of our team members shares. It’s
a great choice for those who want a worry-free, non-inflatable option.
Therm-a-Rest Foam Pad: For toddler-friendly comfort and insulation, Adrianna relies on a Therm-a-Rest Foam Pad, using
it extensively with her babies. Foam pads are a reliable, no-fuss option.
Pillow Talk: A Little Luxury Goes a Long Way
- NEMO Filo Pillow: “A good
pillow drastically improves sleep quality,” asserts a member of our team who refuses to go without one. The NEMO Filo Pillow is a fantastic option, offering inflatable support with a soft cover. - Sea
to Summit Aeros camping pillow: Another excellent choice, the Sea to Summit Aeros camping pillow, is lightweight and packs down incredibly small. It’s a small luxury that makes a huge difference.
👉 Shop Sleeping
Bags on:
- Enlightened Equipment: Enlightened Equipment Official Website
- LL Bean: LL Bean Official Website
- Morrison Outdoors: Morrison Outdoors Official Website
👉 Shop Sleeping Pads on:
- Therm-a-Rest: Amazon | Therm-a-Rest Official Website
- Nemo: Amazon | Nemo Official Website
👉 Shop Camp Pillows on:
- NEMO: Amazon | NEMO Official Website
- Sea to Summit: Amazon | Sea to Summit Official Website
4. Clothing Layers: Mastering the Art of Layer
ing
The secret to staying comfortable in the ever-changing conditions of the backcountry isn’t about packing one heavy jacket; it’s about mastering the art of layering for backpacking. This allows you to adapt to temperature swings, precipitation
, and exertion levels like a pro. Think of yourself as an onion, with each layer serving a specific purpose!
The Layering System Explained:
- Base Layer (Next to Skin): Wicks moisture away
from your body.
- Iksplor Base Layers: Adrianna highly recommends merino wool Iksplor Base Layers for the whole family, worn for “sleeping and chilly mornings.” Merino
wool is excellent for temperature regulation and odor resistance. - Smartwool Base Layers: Another team favorite, Smartwool base layers are incredibly comfortable and effective.
- Burgeon Fl
ume Hoodie: A local NH brand, Burgeon offers quality baselayers like their Flume Hoodie.
- Mid-Layer (Insulation): Traps warm air to keep you to
asty.
-
Patagonia Micro D Fleece: “Indestructible, warm, and light,” the Patagonia Micro D Fleece is a classic mid-layer that stands the test of time.
-
Patagonia Nano Puff Jacket: This synthetic puffer jacket is a fantastic insulating layer, offering warmth even when wet, with “roomy armpits for backpack straps.”
- Outer Layer (Shell): Protects you from wind and rain.
- Black Diamond Fineline Rain Shell: This stretchy, water-resistant shell “packs small” and is perfect for unexpected showers.
REI Trailmade Rain Pants:** Affordable, durable, and easy to slip over shoes, these rain pants are a must-have for wet weather.
Everyday Hiking Clothes & Accessories:
- P
ants/Shorts: - REI Sahara Convertible Pants: Versatility is key! These zip-off pants are perfect for adapting to changing temperatures.
- Patagonia Women’s
Baggies: Adrianna’s “tried and true” choice for shorts, she “won’t take them off” in the wild. - Title Nine abrasive-resistant leggings/pants: Durable
options for women. - Socks:
- Darn Tough Hiker Micro Crew: Made of wool, these socks are incredibly durable and comfortable, a unanimous team favorite.
- Smartwool Socks: Another excellent wool sock option for blister prevention and comfort.
- Undergarments: Sports bras and underwear designed
for active use. - Sleeping Clothes (Optional): Many of us bring a dedicated set of lightweight sleeping clothes (e.g., cotton T-shirt, thin sweats, thick wool socks, camp sweatshirt) to keep our hiking clothes fresh.
- Winter Gear: For colder conditions, consider a Buff, thin gloves, a Columbia Trail Shaker Headring, a Columbia winter neck gaiter, and Columbia Snow Diva
Mittens (especially recommended for cold hands).
👉 Shop Hiking Apparel on:
-
Iksplor: Iksplor Official Website
-
**
Patagonia:** Amazon | Patagonia Official Website -
REI: REI Official Website
-
Black Diamond: Amazon | Black Diamond Official Website
-
Darn Tough: Amazon | Darn Tough Official Website
-
Smartwool: Amazon | Smartwool Official Website
-
Columbia: Amazon | Columbia Official Website
5. Footwear: Boots,
Trail Runners, and Gaiters
Your feet are your most important asset on the trail, so treating them right is non-negotiable! The great debate: hiking boots vs. trail runners? We’ve got perspectives from both
camps.
Trail Runners: Lightweight Agility
| Feature | Design | Grip | Comfort | Durability | Overall Rating |
|---|---|---|---|---|---|
| ** | |||||
| Altra Lone Peak 9+** | 9 | 9 | 9 | 8 | 8.8 |
| Salomon Speedcross 6 – Women’s | 8 | ||||
| 10 | 8 | 8 | 8.5 |
Altra Lone Peak 9+: Many ultralighters swear by trail runners for their lightweight feel and flexibility. The Altra
Lone Peak 9+ is a team favorite, known for its “zero-drop, grippy outsole,” and a wide toe box that accommodates foot swelling on long hikes. Remember to buy 0.5-
1 size up!
Salomon Speedcross 6 – Women’s: For slick or steep trails, the Salomon Speedcross 6 with its “Gore-Tex waterproofing and aggressive grip” is a trusted choice, especially in rugged
terrain like the Canadian Rockies.
Hiking Boots: Support and Protection
- Moab 3 Boots: When you need more ankle support and robust protection, especially in winter or on very rocky trails, traditional
hiking boots are the way to go. The Moab 3 Boots are praised for their “wide toe box” and waterproofing.
Camp Shoes & Traction:
- Birkenstock EVA Sandals: Lightweight
and water-friendly, these are perfect for camp lounging and creek crossings. - Kids Crocs: Adrianna’s boys prefer Crocs for their ease of use and quick-drying nature.
- Kahtoola MICROspikes: For snow and ice, these are an “essential” piece of gear for safe travel.
👉 Shop Hiking Footwear on:
- Altra
: Amazon | Altra Official Website - Salomon: Amazon | Salomon Official Website
- Merrell (Moab): Amazon | Merrell Official Website
- Birkenstock: Amazon | Birkenstock Official Website
- Crocs: Amazon | Crocs Official Website
- Kahtoola: Amazon | Kahtoola Official Website
6. Hydration Systems: Water Filters, Bottles, and Bladders
Staying hydrated is absolutely critical
in the backcountry. You can’t just rely on carrying enough water for your entire trip; you need a reliable way to purify water from natural sources. This is where your backpacking water filtration system comes into play.
Water Filters: Your Lifeline
| Feature | Design | Filtration Rate | Ease of Use | Durability | Overall Rating |
|---|---|---|---|---|---|
| ** | |||||
| Sawyer Squeeze + CNOC Bag** | 9 | 9 | 9 | 9 | 9.0 |
| Platypus 4.0L Gravity Filter | |||||
| 8 | 8 | 9 | 8 | 8.2 |
Sawyer Squeeze + CNOC Bag: This combination is a favorite among our team for its efficiency and reliability. “Fill the
CNOC bag, squeeze through the filter into a 1L Smartwater bottle, and you’re good to go!” explains one of our testers. It’s lightweight, effective, and relatively fast.
Pl
atypus 4.0L Gravity Filter: For families or groups, a gravity filter is a game-changer. Adrianna finds the Platypus 4.0L Gravity Filter “ideal for families; it lasts the entire trip
, reducing the need to hike to water sources for thirsty kids.” Set it up at camp, and let gravity do the work!
Backup Water Treatment: Always carry a backup! Aquatabs (treatment tabs) are ultralight and effective as a secondary purification method.
Water Bottles & Bladders:
-
KWE Nalgene Explorer Bottle: Nalgenes are durable, kid-tough, and
can even hold hot water at the bottom of a sleeping bag for extra warmth. -
Nalgenes: A classic for a reason, Nalgenes are reliable and lightweight.
-
Standalone Water Bladder: For hands-free hydration on the go, a water bladder that fits inside your pack is a great option.
👉 Shop Water Filters on:
- Sawyer: Amazon | Sawyer Official Website
- CNOC Outdoors: CNOC Outdoors Official Website
- Platypus: Amazon | Platypus Official Website
- Aquatabs: Amazon
👉 Shop Water Bottles & Bladders on
:
- Nalgene: Amazon | Walmart | Nalgene Official Website
7. Camp Kitchen: Stoves, Fuel, and Gourmet Backcountry Meals
Ah, the camp kitchen! There’s nothing quite
like a hot meal or a steaming cup of coffee after a long day of hiking. Your backpacking cooking system doesn’t have to be elaborate, but it needs to be efficient and reliable.
Stoves & Fuel: Hot
Meals on the Go
| Feature | Design | Boil Time | Fuel Efficiency | Weight/Packability | Overall Rating |
|---|---|---|---|---|---|
| ** | |||||
| MSR Pocket Rocket** | 9 | 9 | 8 | 10 | 9.0 |
| Jetboil Mini | 8 | 10 | |||
| 9 | 7 | 8.5 |
MSR Pocket Rocket: This compact stove is a consistent favorite across our team and other experienced backpackers. “It boils water fast, even in wind,” making it perfect for hot
meals, hot chocolate, and even roasting marshmallows when campfires aren’t allowed. It’s lightweight and efficient. Pair it with Isopro Fuel.
Jetboil Mini
: While a bit heavier than the Pocket Rocket, the Jetboil Mini cooking system (mentioned in the video) is incredibly fast and efficient for boiling water. “I feel it’s a great setup for
beginners,” the video presenter states, highlighting its ease of use. [cite: #featured-video]
Lighters: Don’t forget a reliable way to light your stove! The BIC EZ Reach Lighter with its extended reach and
bright colors is a simple but effective choice. “Bright colors make it easy to find in gear piles,” Adrianna wisely points out. Always carry two!
Pots &
Utensils: A lightweight Titanium Pot is ideal for boiling water and cooking meals. For eating, consider durable and lightweight options from brands like Sea to Summit.
Backcountry Gourmet: Meals & Snacks
- Dehydrated/Freeze-Dried Meals: These are your best friends for convenience and weight.
- Mountain House: A classic, offering hearty options like Lasagna with
Meat Sauce. - Backpacker’s Pantry: Known for diverse flavors, such as Drunken Noodles with Chicken.
- Good to Go: A local Maine
brand with tasty options. - Snacks: Focus on high-calorie, sugary snacks to replenish energy and electrolytes.
- Clif bars, Verb bars (caffeinated with green tea).
- Honeystinger waffles, Rice Krispies, Twizzler bites, Cheez-Its/Goldfish.
- Don’t forget the
makings for S’mores if campfires are permitted and safe! - Electrolytes & Gels: Essential for preventing cramps and maintaining energy.
- Nuun, Maple
gels, Gu, Honeystinger energy chews. - GU Chews (electrolytes) and GU Liquid Energy (sugar-free, caffeinated gels) are
also recommended. - Coffee: Instant coffee or Dry Brew (condensed coffee chews) are excellent lightweight options for your morning jolt.
👉 Shop Backpack
ing Stoves on:
- MSR: Amazon | Walmart | MSR Official Website
- Jetboil: Amazon | Jetboil Official Website
👉 Shop Dehydrated Meals on:
-
Mountain House: Amazon | Walmart | Mountain House Official Website
-
Backpacker’s Pantry: Amazon | Backpacker’s Pantry Official Website
8. Navigation Tools: Maps, Compasses, and GPS Devices
Getting lost is no fun, and it can quickly turn a fantastic trip into a dangerous situation. That’s why having
redundant backpacking navigation tools is crucial. Never rely on just one method!
Digital Navigators: Watches, GPS, and Apps
| Feature | Design | Battery Life | Offline Maps | Communication | Overall Rating |
|---|---|---|---|---|---|
| :— | :— | :— | :— | :— | :— |
| Garmin Enduro 3 | 9 | 10 | 9 | 7 | 9.0 |
| Garmin inReach Mini 3+ | 9 | 9 | N/A | 10 | 9.5 |
| Apple Watch Ultra 3 | 9 | ||||
| 7 | 8 | 9 | 8.5 | ||
| Garmin GPSMAP 67i | 8 | 9 | 10 | 10 | |
| 9.2 |
Garmin Enduro 3: This watch is a powerhouse for navigation, boasting “preloaded offline trail maps, multi-week battery life, and a rugged button/touch interface.” It’s designed to keep hikers on-route without phone dependency.
Garmin Fenix 8: An alternative to the Enduro, the Garmin Fenix 8 offers “better screen detail, microphone/speaker for
calls, but sacrifices some battery life.” Pair it with the UltraFit band for maximum comfort.
Apple Watch Ultra 3: For Apple users, the Apple Watch Ultra 3
offers “free satellite SOS, GPS performance on par with Garmin,” and can track long day hikes on a single charge. Combine it with the paid version of the Footpath App for offline maps and route
syncing.
Garmin inReach Mini 3+: This is our top recommendation for a satellite communicator. It offers “2-way messaging, voice notes, 100% global coverage,
and a compact design,” making it far more dependable than phones in the backcountry. The Garmin inReach Mini is also a highly recommended optional satellite communicator.
Gar
min GPSMAP 67i: For those who prefer a dedicated, button-only GPS (critical for cold/wet hands), the Garmin GPSMAP 67i is excellent. It has “preloaded maps and built-in inReach
SOS,” and is preferred over the newer H1i model for better real-world track accuracy.
Mobile Apps for Navigation:
- AllTrails Plus: Offers offline maps, live sharing, snow levels,
and wrong-turn alerts. - Organic Maps: A free option for reliable offline maps without community features.
- CalTopo: An excellent tool for trip planning
.
Traditional Navigation: Map and Compass
Even with all the tech, a physical map and compass are non-negotiable backups. Learn how to use them before you hit the trail!
👉 Shop GPS Devices on:
- Garmin: Amazon | Walmart | Garmin Official Website
- Apple Watch Ultra: Amazon | Apple Official Website
- AllTrails: AllTrails Official Website
- Organic Maps: Organic Maps Official Website
9. First Aid and Safety: Emergency Kits and Bear Safety
Safety first, always! A well-stocked **
backpacking first aid kit** and knowledge of wildlife safety are paramount for any outdoor adventure. Don’t skimp on these essentials.
First Aid Kits: Be Prepared for Anything
| Feature | Design | Contents | Compactness | Vers
| atility | Overall Rating |
|---|---|
| Adventure Medical Kit Ultralight .9 | 9 |
| 8 | 8.5 |
Adventure Medical Kit Ultralight .9: This compact kit offers a “balanced function,” covering everything from scrapes to blisters. Adrianna adds baby Tylenol
and bug bite cream to hers, a smart move for family trips.
Adventure Medical Kits Ultralight: Generally, Adventure Medical Kits are a solid choice, and the Ultralight series is designed to be comprehensive
without adding unnecessary bulk.
Essential Additions to Your Kit:
- Band-aids, gauze, Neosporin, antiseptic gel, Ibuprofen, Moleskin (for blisters!).
- Any personal medications you require.
- The GOES App can provide interactive backcountry medicine instructions.
Bear Safety: When in
Bear Country…
-
Bear Spray: If you’re backpacking in areas with bears (like the Canadian Rockies), bear spray is a non-negotiable.
-
Kodiak Bear Spray + Holster: Adrianna recommends
this with a “quick-draw style holster” for essential wildlife protection. -
Counter Assault Bear Spray: Effective against bears, mountain lions, and even humans if necessary.
-
Always pack bear spray while backpacking in the Canadian Rockies.
-
Bear Canisters/Sacks: (More on this in section 16) Essential for storing food safely.
Emergency Communication & Rescue:
- Rescue Insurance: Consider Overwatch & Rescue for coverage of rescue costs, vehicle pickup, and coordination worldwide.
- SOS Backup: rescueME PLB
1: This personal locator beacon has a 7-year battery and requires no subscription for SOS. Note that Garmin inReach devices on suspended plans also include SOS. - Wh
istle: A simple Shoreline Marine Whistle is vital for close-range rescue and signaling.
👉 Shop First Aid Kits on:
- Adventure Medical Kits: Amazon | Adventure Medical Kits Official Website
👉 Shop Bear Spray on:
- Counter Assault:
Amazon | Counter Assault Official Website - Kodiak: Amazon
👉 Shop Satellite Communicators & PLBs on:
- Garmin inReach: Amazon | Garmin Official Website
- rescueME: Amazon | Ocean Signal Official Website
10. Lighting: Headlamps, Lanterns, and Batteries
When the sun dips below the horizon,
your light source becomes indispensable. A reliable backpacking headlamp is a non-negotiable item, allowing you to navigate, set up camp, and cook in the dark, all while keeping your hands free.
Headlamps: Your
Guiding Light
| Feature | Design | Brightness (Lumens) | Battery Life | Weight | Overall Rating |
|---|---|---|---|---|---|
| **Nite | |||||
| core NU25** | 9 | 360 | 9 | 10 | 9.5 |
| Black Diamond Headlamps | 8 | Varies | 8 | ||
| 8 | 8.0 | ||||
| Black Diamond Storm | 8 | 400 | 8 | 8 | 8.2 |
Nitecore NU
25: This ultralight headlamp is a fan favorite for a reason. “It’s USB-C rechargeable, ultralight, and has a simple interface,” making it incredibly user-friendly. One
of our team members has used theirs for “3+ years” without issue!
Black Diamond Headlamps: Black Diamond offers a wide range of reliable headlamps for both kids and adults. They’re known for their durability and consistent performance.
Black Diamond Storm: A step up in power and features, the Black Diamond Storm is a robust headlamp with good brightness and weather resistance.
Always carry extra batteries, or ensure your rechargeable headlamp is fully charged!
Powering Your Electronics:
- Belkin 10k Power Bank: For charging your phone, GPS, or other small
electronics, a lightweight power bank is essential. The Belkin 10k Power Bank with a built-in USB-C cable is a convenient option.
👉 Shop Headlamps on:
- Nitecore
: Amazon | Nitecore Official Website - Black Diamond: Amazon | Walmart | Black Diamond Official Website
👉 Shop Portable Chargers on:
- Belkin: Amazon |
Walmart | Belkin Official Website
11. Hygiene
and Sanitation: Trowels, TP, and Hand Sanitizer
Maintaining good hygiene in the backcountry is about more than just personal comfort; it’s crucial for preventing the spread of illness and adhering to Leave No Trace principles. Let
‘s talk about responsible backcountry sanitation!
The Essentials for “Going” in the Wild:
- Trowel: A lightweight trowel is essential for digging catholes (small holes for human waste).
BoglerCo Ultralight Trowel: This ultralight option is a favorite for its efficiency.
-
Any sturdy, lightweight trowel will do the trick.
-
Toilet Paper: Pack out all used toilet paper in a dedicated Ziploc bag. Yes, all of it!
-
Hand Sanitizer: Use liberally after bathroom breaks and before preparing
food. -
Kula cloth: For women, a Kula cloth (pee cloth) is a reusable, antimicrobial option for feminine hygiene.
Personal Hygiene:
-
Toothbrush & Toothpaste
: A travel-sized toothbrush and a small tube of toothpaste are all you need. -
Chapstick & Deodorant: Small comforts that make a difference.
-
Eye Drops, Hair Ties: Don’t forget these small but important items.
-
BOGI Microfiber Towel: Fast-drying, lightweight, and folds small, it
‘s “perfect for camp or glacier dips.” It clips easily to the outside of your pack. -
Body Glide: Highly recommended for chafing prevention, especially on longer hikes.
-
Women’s Specific: Period products and feminine hygiene wipes (pack out all used items!).
👉 Shop Camp Hygiene on:
- BoglerCo: BoglerCo Official Website
- Kula Cloth: Kula Cloth Official Website
- Sea to Summit: Amazon | Sea to Summit Official Website
- Body Glide: Amazon | Body Glide Official Website
12. Repair Kits: Duct Tape, Patches, and Multi-Tools
Things break
in the backcountry. It’s not a matter of if, but when. A small, well-stocked backpacking repair kit can save your trip from a minor inconvenience turning into a major headache.
Essential Repair Items:
- Duct Tape/Gear Tape: This is the ultimate backcountry fix-all! Wrap a few feet around your water bottle or trekking pole to save space. It can patch holes in tents, fix broken straps, and even temporarily
repair a leaky water bladder. - Tenacious Tape Patches: For more durable repairs on jackets, tents, or sleeping pads, Tenacious Tape patches are fantastic.
- Multi-Tool/
Knife: A small, lightweight multi-tool or knife is invaluable for countless tasks, from cutting cordage to making minor gear adjustments. The Outdoor Element Scout Feather knife includes a fire starter, sharpener, and whistle. For ultralighters, the Zpacks Pipsqueak (8g) is a minimalist backup. - Safety Pins: Handy for quick clothing repairs or securing gear.
Paracord:** A few feet of paracord can be used for hanging food, clotheslines, or emergency repairs.
👉 Shop Repair Kits on:
- Gear Aid (Tenacious Tape): Amazon | Gear Aid Official Website
- Leatherman (Multi-tools): Amazon | Leatherman Official Website
- Outdoor Element: Outdoor Element Official Website
- Zpacks: Zpacks Official Website
13. Electronics: Power Banks, Solar Chargers, and Communication Devices
While we go to the backcountry to disconnect
, a few key electronics can enhance safety and convenience. The goal is to be prepared, not to bring your entire home office!
Powering Up:
- Portable Phone Charger/Power Bank: As mentioned in the lighting section, a
reliable power bank like the Belkin 10k Power Bank is crucial for keeping your phone, headlamp, and other small devices charged. - Solar Chargers (Optional): For
extended trips, a lightweight solar charger can supplement your power bank, especially if you have good sun exposure.
Communication:
- Satellite Communicators: (See section 8 for more detail) Devices like the Garmin inReach Mini
3+ are essential for emergency communication outside of cell service. - Rocky Talkie: For group hikes, these rugged and simple radios are “essential to maintain contact when splitting up.”
- Wireless Earbuds (for travel only): While we encourage listening to nature on the trail, wireless earbuds can be great for travel days to and from the trailhead.
Other Electronics:
- Camera: If photography is your passion, don’t forget your camera with extra batteries and memory cards.
👉 Shop Portable Chargers on:
- Belkin:
Amazon | Walmart | Belkin Official Website
👉 Shop Communication Devices on:
- Rocky Talkie: Amazon | Rocky Talkie Official Website
14. Sun and Insect Protection: Sunscreen, Hats, and Bug Spray
The sun and bugs can quickly turn a pleasant hike into an irritating ordeal. Don’t underestimate the
power of good backpacking sun protection and insect repellent!
Sun Protection:
-
Sunscreen: Apply generously and reapply often, especially at higher altitudes or near water/snow.
-
Hats
: -
Sprints baseball cap: Great for keeping the sun off your face.
-
Carhart beanie or wool hat: For colder, sunny days.
-
Sunglasses:
-
Oakley Radar EV: Offers wrap-around UV protection.
-
goodr: Recommended for their style and effectiveness.
Insect Protection:
-
Sawyer Picaridin Lotion: “Safer than DEET, long-lasting, and non-greasy,” this lotion is a top pick for skin application.
-
Sawyer Permethrin Spray: Treat your clothing, tent, and gear with Permethrin to kill insects on contact. Do NOT apply directly to skin.
-
Sea to Summit Head Net
: When gnats or mosquitoes are particularly relentless, a head net can prevent them from “driving hikers insane.”
👉 Shop Insect Repellent on:
- Sawyer: Amazon | Walmart | Sawyer Official Website
- Sea to Summit: Amazon | Sea to Summit Official Website
👉 Shop Sunglasses on:
- Oakley: Amazon
| Oakley Official Website - goodr: Amazon | goodr Official Website
15. Trekking Poles and Hiking Accessories
Sometimes, the smallest additions make the biggest difference. Backpacking trekking poles and other accessories can significantly improve your comfort, stability, and efficiency
on the trail.
Trekking Poles: Your Extra Limbs
- Black Diamond Trail Back: Trekking poles reduce strain on your knees, improve balance, and provide extra propulsion on ascents. The Black Diamond Trail Back
poles are a reliable and durable choice. - Benefits:
- ✅ Reduce impact on joints, especially downhill.
- ✅ Provide stability on uneven or slippery terrain.
- ✅
Aid in river crossings. - ✅ Can be used to pitch some ultralight shelters.
Other Handy Accessories:
- Trail Tether: This “heavy-duty gear clip/strap” is Adrianna’s ”
not-so-secret weapon” for clipping toys, bottles, and shoes to packs, preventing dropped gear. Genius! - Spuds Stick Stashers: Magnets to attach poles to your pack when
not in use. - Carabiners and Paracord: Always useful for attaching gear, setting up a clothesline, or emergency repairs.
- Ear Plugs
: A godsend for crowded campgrounds or if you’re a light sleeper.
👉 Shop Trekking Poles on:
- Black Diamond: Amazon | Walmart | Black Diamond Official Website
👉 Shop Backpacking Accessories on:
- Trail Tether: Trail Tether Official Website
- Spuds Stick Stashers: Spuds Stick Stashers Official Website
16. Food Storage: Bear Canisters, Ursacks, and Hanging Bags
Proper food storage in the backcountry is non-negotiable,
especially in bear country. It’s not just about protecting your food; it’s about protecting wildlife by preventing them from associating humans with food. This is a core tenet of responsible backpacking food storage.
Bear-Resistant Containers
:
- Bear Canisters: These hard-sided containers are required in many national parks and wilderness areas.
- BearVault BV ONE: A popular and effective choice for keeping bears out of your provisions.
- Bare Boxer Contender: Noted as one of the smallest and lightest canisters available.
- Ursacks: A soft-sided, tear-resistant bag that can be hung
or tied to a tree. They’re lighter than canisters but may not be approved in all areas. Always check local regulations! - Hanging Bags: The traditional method of hanging food from a tree branch, using a proper
bear bag hang technique, is still viable in some areas. However, it requires specific trees and can be challenging to execute correctly.
Expert Tip: Always check the regulations for your specific hiking area before you go! Some places mand
ate bear canisters, while others allow Ursacks or proper bear hangs.
👉 Shop Bear Canisters on:
- BearVault: Amazon | BearVault Official Website
- Bare Boxer: Bare Boxer Official Website
👉 Shop Ursacks on:
Ursack: Amazon | Ursack Official Website
17. Camp Furniture: Chairs
, Tables, and Ground Sheets
While “ultralight” often means leaving luxuries behind, a few small comforts at camp can significantly boost morale. Think of these as your backpacking camp comfort items.
Camp Chairs: A
Backcountry Throne
- Helinox Chair: “Backpacking luxury” is how Adrianna describes her Helinox Chair, noting it gives a parent’s back a much-needed break at camp. These
lightweight, packable chairs are a true indulgence after a long day of hiking.
Ground Sheets: Protecting Your Investment
- Nemo Hornet Footprint: While not strictly “furniture,” a ground sheet or footprint is essential for protecting the
bottom of your tent from abrasion and moisture, extending its lifespan. The Nemo Hornet Footprint is designed specifically for the Nemo Hornet tent.
👉 Shop Camp Chairs on:
- Helinox: Amazon | Helinox Official Website
18. Season-Specific Gear: Winter Camping and Rain Gear
Backpacking
isn’t a one-size-fits-all activity. Your gear needs to adapt to the season and anticipated weather conditions. Ignoring this is a recipe for misery (or worse!). This section focuses on seasonal backpacking gear and staying
dry.
Rain Gear: Your Waterproof Armor
-
Black Diamond Fineline Rain Shell: A stretchy, water-resistant, and packable rain shell is crucial for staying dry in wet conditions.
-
REI Trailmade Rain Pants: Don’t forget your legs! These affordable, durable rain pants are easy to slip over your hiking pants.
-
Zpacks Vertice Rain
Mitts: For truly miserable, cold rain, these ultralight rain mitts will keep your hands warm and functional.
Winter Camping Essentials: Embracing the Cold
Winter backpacking is a whole different beast
, requiring specialized gear for warmth and safety.
- Insulated Clothing: Heavier base layers, mid-layers (like the Patagonia Micro D Fleece and Patagonia Nano Puff Jacket), and
a robust outer shell are essential. - Warm Headwear: A Smartwool Merino 250 Beanie, Columbia Trail Shaker Headring, or a thick wool hat are crucial for heat retention.
- Gloves/Mittens: Thin gloves for dexterity, and heavier, insulated mittens like the Columbia Snow Diva Mittens for extreme cold.
Traction: Kahtoola MICROspikes are absolutely essential for navigating snow and ice.
- Sleeping System: A warmer sleeping bag or quilt (e.g., 10°F or lower rating) and a high R-value sleeping pad (like the Therm-a-Rest NeoAir XTherm NXT with R-value 7.3) are critical for insulation from the cold ground.
👉 Shop Rain Gear on:
- Black Diamond: Amazon | Black Diamond Official Website
- REI: REI Official Website
- Zpacks: Zpacks Official Website
Shop
Winter Camping Gear on:
| – Smartwool: Amazon | Smartwool Official Website |
|---|---|
| Columbia: Amazon | Columbia Official Website |
- Kahtoola: Amazon | Kahtoola Official Website
19. Kids and Family
Gear: Lightweight Solutions for Little Hikers
Backpacking with kids? It’s an adventure in itself! Adrianna, the “outdoor adventure mom,” has truly “dialed in the gear [she] truly loves and trusts” after
years of family trips in the Canadian Rockies. Her insights are invaluable for anyone planning family backpacking trips.
Carrying Little Ones:
- Trail Magik Carrier: This ingenious “front-carry system
clips to a backpack” for carrying kids. Adrianna notes it can be uncomfortable on shoulders during long hours, but reminds us, “Backpacking isn’t always about perfect comfort though!”
Kids’ Specific Gear:
- Morrison Baby/Kids Sleeping Bag: As mentioned earlier, this is a “game changer” for keeping little ones safe and cozy.
- Kids
Camp Crew: A “cozy, fun clothing staple” that Adrianna’s boys wear everywhere. - Kids Crocs: Easy on/off, quick-drying, and customizable – a
practical choice for camp shoes for kids. - Kids’ Headlamps: Black Diamond offers headlamps specifically designed for kids.
- KWE Nalgene
Explorer Bottle: Durable, colorful, and kid-tough water bottles.
Expert Tip: Involve your kids in the packing process! Even carrying a small backpack with their own water bottle and a few snacks
can instill a sense of responsibility and excitement.
👉 Shop Kids Camping Gear on:
- Morrison Outdoors: Morrison Outdoors Official Website
- Trail Magik: Trail Magik Official Website
- Kids Camp Crew: Kids Camp Crew Official Website
- Crocs: Amazon | Crocs Official Website
20. Luxury Items: Camp Coffee, Books, and Comforts
We’
ve covered the essentials, but what about those little extras that make a trip truly special? These backpacking luxury items are about enhancing your experience and bringing a touch of home to the wild.
Small Comforts, Big Impact:
-
Camp Coffee: For many of us, a good cup of coffee is non-negotiable.
-
Instant coffee or Dry Brew (condensed coffee chews) are lightweight options.
-
Books/Journal: A lightweight book, puzzle book (Sudoku, crosswords), or a journal with pens/pencils can provide welcome downtime at camp.
-
Sea to Summit Aeros
camping pillow: As mentioned before, a dedicated pillow is a small luxury that makes a huge difference in sleep quality. -
Rumpl Everywhere Towel: Recommended for sweat, swims, rinses,
and even ground protection, this towel is versatile and quick-drying. -
Wireless Earbuds: While we advocate for soaking in nature’s sounds, earbuds can be a nice addition for travel to
and from the trailhead.
👉 Shop Camp Luxuries on:
- Dry Brew: Dry Brew Official Website
- Sea to Summit: Amazon | Sea to Summit Official Website
- Rumpl: Amazon | Rumpl Official Website
21. Pack Organization: Stuff Sacks, Dry
Bags, and Compression Straps
A disorganized pack is a frustrating pack. Efficient backpacking pack organization isn’t just about neatness; it’s about accessibility, weight distribution, and protecting your gear.
Keeping Things
Tidy and Dry:
-
Sea to Summit Ultra-Sil dry bags/stuff sacks: These are fantastic for organizing and waterproofing different categories of gear (e.g., sleeping clothes, food, electronics).
-
Gallon Ziploc bags: A simple, inexpensive, and highly effective way to organize and waterproof items inside your pack.
-
Compression Straps: Use these both inside and outside your
pack to cinch down bulky items and stabilize your load.
Expert Tip: Color-code your stuff sacks! This makes it incredibly easy to find what you need quickly, even in the dark.
👉 Shop Dry Bags on:
- Sea
to Summit: Amazon | Sea to Summit Official Website
22
. Weight Distribution: How to Pack Your Backpack Like a Pro
You’ve got all the gear, but how do you get it into your pack so it feels comfortable and balanced? Mastering backpack weight distribution is an art form that
will make miles melt away.
The Golden Rules of Packing:
- Bottom (Sleeping Bag Zone): Pack bulky, lightweight items here that you won’t need until camp, like your sleeping bag and camp clothes
. This creates a stable base. - Middle (Core Weight): Place your heaviest items closest to your back, between your shoulder blades. This includes food, water (if carrying a bladder), and dense cooking gear. This keeps
the center of gravity high and close to your body for better balance. - Top (Quick Access): Items you’ll need frequently throughout the day go here: rain gear, snacks, navigation tools, first-aid kit, and
water bottle. - Exterior Pockets: Smaller, frequently accessed items like sunscreen, bug spray, and a headlamp.
- Compression: Cinch down all compression straps to prevent your gear from shifting,
which can throw off your balance and cause discomfort.
Anecdote: “I remember my first backpacking trip,” one of our team members recounts with a chuckle. “My pack was a lopsided mess! Every step felt like I was fighting
a wrestling match with my gear. Learning proper weight distribution was a revelation – it truly changed how I experienced hiking.”
The first YouTube video embedded in this article showcases a lightweight solo backpacking setup and offers practical recommendations for efficiently packing an
Osprey 34L backpack. [cite: #featured-video] The presenter emphasizes keeping essentials organized in dry bags and highlights how a well-packed, lighter setup allows you to “pack more food and go longer if you want to
.” [cite: #featured-video]
👉 Shop Backpacking Accessories on:
- Osprey: Amazon
| Osprey Official Website
23. Leave No Trace Principles: Ethical Backpacking Practices
As passionate campers and backpackers, we at Camping Checklist™ are staunch
advocates for the Leave No Trace principles. These seven guidelines are the bedrock of ethical outdoor recreation, ensuring that we protect the wild places we love for generations to come.
The Seven Principles of Leave No Trace:
- Plan Ahead
and Prepare: Research your destination, anticipate weather, pack appropriately, and know regulations. - Travel and Camp on Durable Surfaces: Stick to established trails and campsites.
- Dispose of Waste Properly: Pack out everything
you pack in (including all trash, food scraps, and toilet paper). Dig catholes for human waste. - Leave What You Find: Don’t remove natural objects or disturb cultural artifacts.
- Minimize
Campfire Impacts: Use established fire rings, keep fires small, and ensure they are completely out. In many areas, campfires are restricted or prohibited. - Respect Wildlife: Observe from a distance, never feed animals, and store
food properly. - Be Considerate of Other Visitors: Yield to others on the trail, keep noise levels down, and respect privacy.
Why it Matters: Adhering to these principles helps preserve the natural beauty, ecological
health, and wilderness character of our outdoor spaces. It’s about being a good steward of the land.
For more detailed information, visit the official Leave No Trace Center for Outdoor Ethics website.
24. Trip Planning: Permits, Weather, and Route Research
The adventure truly begins long before you hit the trailhead. Thorough backpacking trip planning is the unsung hero of a successful and safe outdoor experience. Don
‘t just wing it!
Essential Planning Steps:
- Permits & Reservations: Many popular trails and wilderness areas require permits, especially for overnight stays. Research and secure these well in advance.
- Outdoor
Status: A useful tool for checking permit availability. - Consider an America the Beautiful Pass for free entry to federal lands.
- Route Research:
-
Maps & Guidebooks: Study your route, elevation profiles, water sources, and potential hazards.
-
CalTopo: An excellent online tool for detailed trip planning and map creation.
-
AllTrails Plus: Offers offline maps and route information.
-
Organic Maps: Another reliable option for offline maps.
- Weather
Forecasts: Always check the forecast for your specific area, not just the nearest town.
- NOAA/Mountain Forecast: Provide specialized weather predictions for mountainous regions.
Watch Duty:** An app for wildfire alerts, crucial in fire-prone areas.
4. Emergency Plan:
- Inform someone of your itinerary, expected return, and emergency contacts.
Know where the nearest ranger station or emergency services are.
- Have a plan for unexpected delays or emergencies.
Anecdote: “We once planned a trip to a remote section of the Sierras, only to
arrive at the trailhead and realize we needed a bear canister, which we hadn’t packed because we hadn’t checked the specific regulations for that zone,” one of our team members recalls. “It meant a frantic, hours-long drive to
the nearest town with an outdoor store. Lesson learned: always check local regulations and permits!“
👉 Shop Hiking Guides on:
- REI: REI Official Website
- Amazon: Amazon
25. Pre-Trip Gear Testing: Shakedown Hikes
and Break-in Periods
This is perhaps one of the most overlooked, yet critical, steps in backpacking preparation: pre-trip gear testing. Don’t let your first time using new gear be on day one of a
multi-day trek!
Why Test Your Gear?
- Comfort: New boots need to be broken in to prevent blisters. A new pack needs to be adjusted and loaded to ensure a comfortable fit.
- Functionality
: Does your water filter work efficiently? Can you set up your tent quickly in the dark? Does your stove light reliably? - Compatibility: Do all your gear items fit together as planned? Does your sleeping bag fit in your pack
with everything else? - Confidence: Knowing your gear works and fits properly builds confidence and reduces anxiety on the trail.
How to Conduct a “Shakedown Hike”:
- Pack it all up: Load your backpack
with everything you plan to take on your actual trip. - Go for a hike: Take a day hike, or even an overnight trip, on a local trail. This doesn’t have to be epic; just long
enough to test your gear under realistic conditions. - Pay attention:
- Are your boots causing hot spots?
- Is your pack rubbing anywhere?
- Can you easily access frequently needed
items? - Does your cooking system perform as expected?
- Is your sleeping system warm enough?
- Does your rain gear hold up?
- Adjust and refine: After your sh
akedown, make any necessary adjustments to your pack, gear choices, or packing strategy. This is the time to swap out uncomfortable items or practice setting up your shelter.
The presenter in the featured video, discussing a lightweight backpacking setup, emphasizes the importance
of choosing versatile gear and efficiently packing the backpack, implicitly highlighting the benefits of testing and refining your loadout. [cite: #featured-video] “Don’t knock it till you try it,” they advise, suggesting that sometimes trying
out new gear or packing methods is the only way to find what truly works for you. [cite: #featured-video]
🧠 Expert Insights: Common Mistakes and How to Avoid Them
Even the most seasoned backpackers have
made a blunder or two (or twenty!). Learning from these missteps is key to becoming a more confident and comfortable adventurer. Here at Camping Checklist™, we’ve seen it all, and we’re here to share some common backpacking
mistakes and our expert advice on how to sidestep them.
- ❌ Overpacking (The “Just in Case” Syndrome): We’ve all been there, staring at a pile of gear, thinking, “What
if I need this… or this… or this?!” The result? A pack that feels like a sack of bricks, sucking the joy out of every mile. - ✅ How to Avoid: Be ruthless with your gear choices
. Lay everything out, then cut 20%. Ask yourself: Is this truly essential for safety or comfort, or is it a “just in case” item? Prioritize multi-use items. Consider the “first YouTube video” presenter’s
advice on a 15-pound solo setup, demonstrating that less can indeed be more. [cite: #featured-video] - ❌ Not Testing New Gear: Taking brand-new boots, a tent, or a stove on
a multi-day trip without a trial run is a gamble. Blisters, a leaky tent, or a non-starting stove can quickly ruin a trip. - ✅ How to Avoid: Conduct a “shakedown hike”
with all your gear, as discussed in Section 25. Break in those boots! Practice setting up your tent. Cook a meal with your new stove. - ❌ Poor Navigation Skills/Reliance on One Device: Your phone battery
dies. Your GPS unit malfunctions. Your map gets wet. If you only have one navigation method, you’re in trouble. - ✅ How to Avoid: Always carry redundant navigation: a charged phone with offline maps (like AllTrails Plus or Organic Maps), a dedicated GPS device (like a Garmin inReach Mini 3+ or Garmin GPSMAP 67i), and a physical map and compass. More importantly, learn how to use them all!
- ❌ Inadequate Hydration/Water Filtration: Dehydration is a silent enemy, especially when
you’re exerting yourself. Relying solely on bottled water is impractical for multi-day trips. - ✅ How to Avoid: Carry a reliable water filter (Sawyer Squeeze or Platypus Gravity Filter) and a backup purification method (Aquatabs). Know your water sources. Drink frequently, even if you don’t feel thirsty.
- ❌ Ignoring Weather
Forecasts: Thinking “it’ll be fine” when the forecast calls for rain or a temperature drop is a recipe for hypothermia or misery. - ✅ How to Avoid: Check multiple reliable weather sources (NOAA, Mountain Forecast) for your specific area before and during your trip (if you have service). Pack appropriate layers and rain gear.
- ❌ Neglecting Leave No Trace Principles: Leaving trash, not
digging catholes, or disturbing wildlife harms the environment and impacts other hikers. - ✅ How to Avoid: Educate yourself on the Seven Principles of Leave No Trace (Section 23) and commit to practicing them diligently
. Pack out everything, bury human waste properly, and respect wildlife. - ❌ Not Having an Emergency Plan: What if you get injured? What if you get lost? What if a wildfire breaks out?
- ✅ **
How to Avoid:** Share your detailed itinerary with a trusted contact. Carry a satellite communicator (Garmin inReach) for emergency SOS. Consider rescue insurance (Overwatch & Rescue). Know your limits and turn back if conditions become unsafe.
By being mindful of these common pitfalls, you’ll be well on your way to a safer, more enjoyable, and truly unforgettable backpacking experience!
📊 Gear Comparison Tables
: Top Brands and Models Reviewed
Choosing the right gear can be overwhelming with so many fantastic options out there. To help you make informed decisions, we’ve compiled some comparison tables highlighting top-performing brands and models in key categories, drawing on our team
‘s experience and insights from other experts.
Backpack Comparison: Capacity, Comfort & Weight
| Model | Capacity (L) | Frame Type | Key Features | Weight (Approx.) | Best For |
|---|---|---|---|---|---|
| Osprey Renn 65 | 65 | Internal | |||
| Adjustable torso, integrated raincover, sleeping bag compartment | 3.5 lbs | Longer trips, comfort-focused, beginners | |||
| Zpacks Arc Zip Ultra 62L | |||||
| 62 | Internal (Arc) | Ultralight DCF, trampoline back system, roll-top closure, durable | 1.5 lbs | Ultralight enthusiasts, experienced hikers | |
| **O | |||||
| sprey Talon 3** | 22-33 | Internal | Vented back panel, indestructible, comfortable with heavy loads | 1.8-2.5 lbs | Day hikes, |
| fast & light overnights | |||||
| Kelty Pack | Varies | Internal/External | Value-oriented, durable, good for beginners | 3-5 lbs | Budget |
| -conscious, general backpacking |
Our Take: For beginners or those prioritizing comfort on longer trips, the Osprey Renn 65 is a fantastic choice. If you’re ready to invest in serious weight savings and efficiency
, the Zpacks Arc Zip Ultra 62L is a top-tier ultralight option. For day hikes, the Osprey Talon 3 is hard to beat for its comfort and durability.
Shelter Comparison:
Tents for Every Adventure
| Model | Capacity | Type | Key Features | Weight (Approx.) | Best For |
|---|---|---|---|---|---|
| :— | :— | :— | :— | :— | :— |
| MSR Elixir 4 Tent | 4-person | Freestanding | Spacious, two large doors, compact for carrying, robust | 7 | |
| lbs | Family backpacking, group trips | ||||
| Big Agnes Tiger Wall UL Tent | 3-person | Semi-freestanding | Ultralight, two doors/vestibules, reliable | ||
| , “dream tent” | 2.5 lbs | Ultralight solo/duo, fast & light | |||
| Nemo Hornet 2 person | 2-person | Semi | |||
| -freestanding | Ultralight, good livability, quick setup, requires footprint | 2 lbs | Ultralight duo, minimalist solo | ||
| Durston X-Dome 1+ | 1-person | Semi-freestanding | Pitches rainfly first, easy setup, excellent weather protection | 1.8 lbs | Solo ultralight, wet conditions |
| **Kamm | |||||
| ok Roo Double** | 2-person | Hammock | Recycled fabric, comfortable, requires suspension system & tarp | 1.5 lbs (hammock only) | Hammock camping, warm |
| weather, tree-rich areas |
Our Take: For families, the MSR Elixir 4 offers space and reliability. If ultralight is your mantra, the Big Agnes Tiger Wall UL and **Nemo Hornet
** are fantastic, with the Durston X-Dome 1+ excelling in wet conditions. Hammock campers will love the comfort of the Kammok Roo Double.
Water Filter Comparison: Staying Hydrated Saf
ely
| Model | Type | Filtration Rate | Flow Rate (Approx.) | Weight (Approx.) | Key Features |
|---|---|---|---|---|---|
| :— | :— | :— | :— | :— | :— |
| Sawyer Squeeze | Squeeze Filter | 0.1 micron | Fast | 3 oz | Lightweight, durable, fits standard bottles, easy |
| to backflush | |||||
| Platypus 4.0L Gravity Filter | Gravity Filter | 0.2 micron | Medium | 12 oz | Hands-free, ideal |
| for groups/families, large capacity | |||||
| Aquatabs | Chemical Tabs | Kills bacteria/viruses | Slow (30-60 min) | <1 oz | |
| Ultralight backup, no moving parts, long shelf life |
Our Take: The Sawyer Squeeze is a versatile and efficient choice for most backpackers. For groups or those who prefer passive filtration at camp, the **
Platypus Gravity Filter** is excellent. Always carry Aquatabs as a lightweight, reliable backup!
🏕️ My Camp Setup: A Real-World Look at Our Loadout
You’ve seen the lists
, read the reviews, and absorbed the wisdom. Now, let’s pull back the curtain and show you a glimpse into what our expert team at Camping Checklist™ actually carries on a typical multi-day backpacking trip. This isn’t a
“one-size-fits-all” solution, but a real-world example of how we combine different pieces of gear to create a functional, comfortable, and reliable setup.
For a typical 3-season, 3-day,
2-night trip in moderate terrain, here’s a snapshot of what one of our team members, let’s call her “Trailblazer Tara,” usually packs:
- Backpack: Osprey Aura
AG 50L – “I love the anti-gravity suspension system; it makes even heavier loads feel lighter, and the ventilation is a dream on hot days.” - Shelter: Big Agnes Copper Spur HV
UL2 Tent – “It’s ultralight, incredibly spacious for one person (and my gear!), and I can pitch it quickly even if a storm rolls in. I always use the matching footprint.” - Sleeping
System: - Sleeping Bag: Feathered Friends Flicker UL 20 Quilt – “The versatility of a quilt is unmatched. I can vent it when it’s warm or cinch it tight when the
temps drop. Plus, it’s incredibly light and warm.” - Sleeping Pad: Therm-a-Rest NeoAir XLite NXT – “The R-value is fantastic for its weight, and it’s
surprisingly comfortable. A good night’s sleep is non-negotiable for me!” - Pillow: NEMO Fillo Elite Pillow – “It’s tiny, light, and provides just enough loft
to make a huge difference in my sleep quality.” - Clothing:
- Base Layers: Smartwool Merino 150 Base Layer top and bottom – “Merino wool is magic. It wicks,
regulates temperature, and doesn’t stink after days on the trail.” - Mid-Layer: Patagonia R1 Fleece Hoody – “My go-to for active insulation. It’s warm, breathable, and
has a hood for extra coziness.” - Puffy Jacket: Arc’teryx Cerium LT Hoody – “My warmth insurance. Super light, incredibly warm for its weight, and packs down to nothing.”
Rain Shell: Outdoor Research Helium Rain Jacket – “Ultralight, waterproof, and surprisingly durable. It lives in my pack’s top pocket.”
- Hiking Pants: Prana Stretch Zion Pants – ”
Comfortable, durable, and quick-drying. I wear these every day.” - Socks: Darn Tough Hiker Micro Crew (2 pairs) – “These are simply the best. No blisters, ever
, and they last forever.” - Camp Shoes: Xero Shoes Z-Trail Sandals – “Lightweight, packable, and a lifesaver for airing out my feet at camp.”
- Footwear
: Altra Lone Peak Trail Runners – “The wide toe box is a game-changer for my feet, and the grip is fantastic on most trails.” - Hydration:
- Water Filter: Saw
yer Squeeze Filter with a CNOC Vecto 2L water bag – “Fast, reliable, and easy to use.” - Water Bottles: Two 1L Smartwater bottles – “Lightweight, durable
, and fit the Sawyer filter perfectly.” - Camp Kitchen:
- Stove: MSR Pocket Rocket 2 with a small fuel canister – “Boils water in minutes, super compact.”
Pot: Toaks Titanium 750ml Pot – “Ultralight, holds enough for my meals and coffee.”
- Utensil: Sea to Summit Alpha Light Spork – “Simple
, light, effective.” - Food: A mix of Backpacker’s Pantry meals, Clif Bars, GU Energy Gels, and a small bag of nuts/dried fruit. “And always,
always instant coffee!” - Navigation:
- Garmin inReach Mini 2 – “For peace of mind and emergency communication.”
- Phone with AllTrails Pro (downloaded maps) – “My primary navigation, but never my only.”
- Physical Map and Compass – “My ultimate backup, and I know how to use them!”
- Safety & First Aid:
Adventure Medical Kits Ultralight .7** (customized with personal meds) – “Small but mighty.”
-
Counter Assault Bear Spray (in bear country) – “Always accessible on my hip belt.”
-
Whistle (integrated into pack sternum strap)
-
Lighting: Nitecore NU25 Headlamp – “Ultralight, bright, and USB-C rechargeable.”
Other Essentials:**
- Small repair kit (duct tape, Tenacious Tape, safety pins)
- Sunscreen, Sawyer Picaridin bug lotion
- BoglerCo Ultralight Trow
el & Kula Cloth - Anker Power Bank (10,000 mAh)
- Black Diamond Trail Ergo Cork Trekking Poles
“This setup allows me to be
comfortable and safe, without feeling like I’m hauling a house on my back,” Tara concludes. “It’s a balance I’ve found through years of trial and error, and it’s always evolving!”
📝
Downloadable Resources: Printable PDF Checklist
We know how much information we’ve just thrown your way! To make your backpacking preparations even easier, we’ve created a comprehensive, printable PDF checklist based on all the expert advice and gear recommendations you
‘ve just read.
This checklist is designed to be your ultimate companion, whether you’re a seasoned pro or just starting your backpacking journey. It includes all 25+ essential gear categories, space for your own notes, and
reminders for pre-trip planning and Leave No Trace principles.
Download Your Ultimate Backpacking Checklist Here!
Download Backpacking Checklist PDF (Note: This is a placeholder link and should be replaced with the actual PDF link.)